
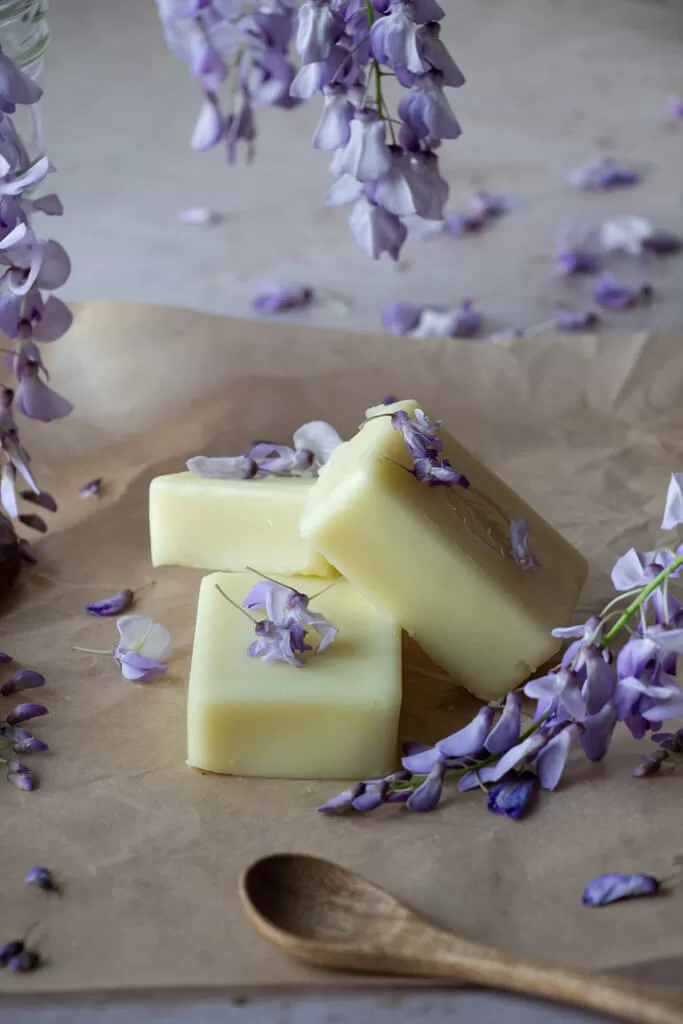
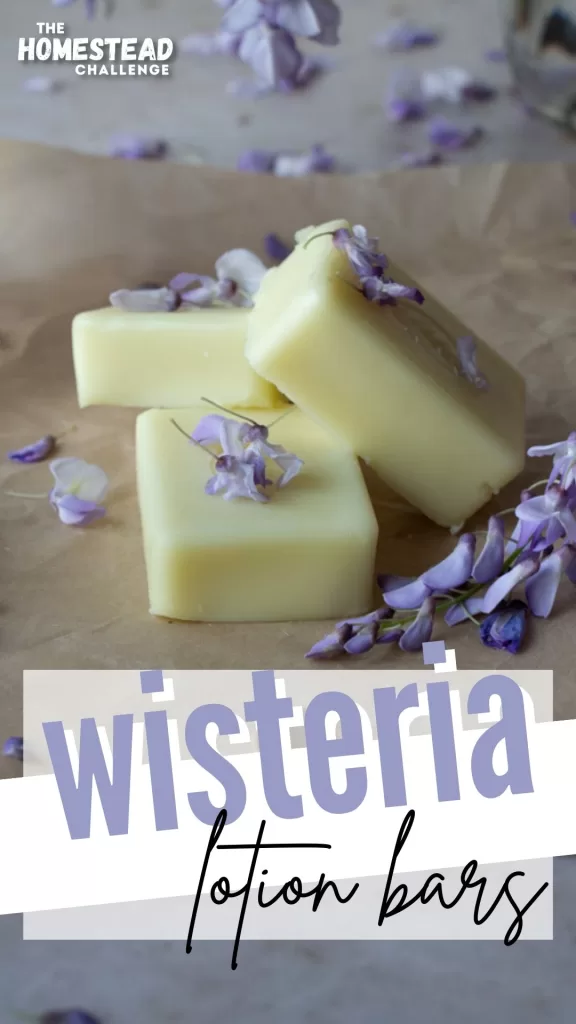
DIY Wisteria Lotion Bars
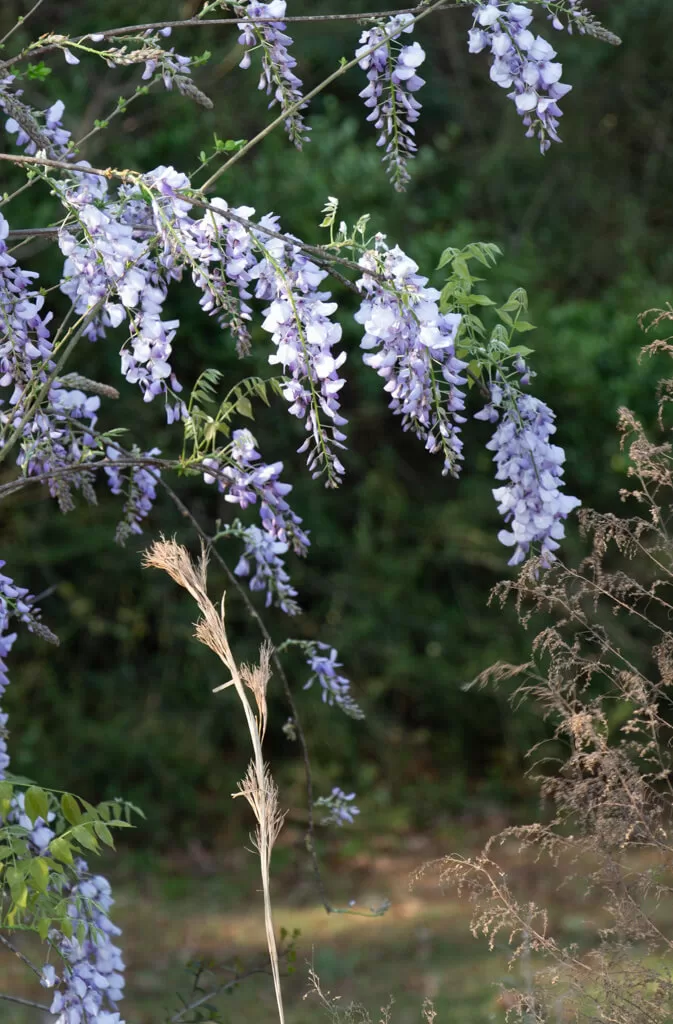
My neighborhood is currently in bloom, and when I saw the purple peeking from the forest, I knew I had to create Wisteria lotion bars. This recipe is so easy to make (even though I totally made two big mistakes that I will tell you about later). Grab your wicker foraging basket and romanticize the process of making these DIY Wisteria lotion bars (it’s what my cottage core dreams are made of).
What is a lotion bar?
A lotion bar is a solid, compact form of moisturizer that looks like a bar of soap, but is made with nourishing ingredients like shea butter, oils, and beeswax. It is designed to melt slightly when it comes in contact with your skin, allowing you to easily apply a thin layer of moisturizer.
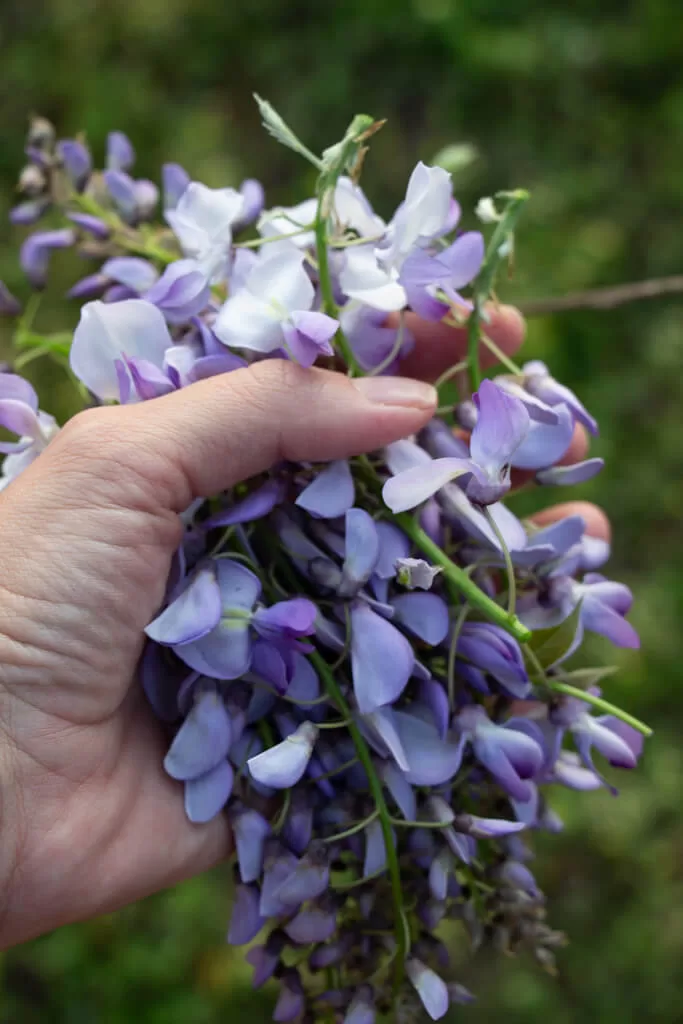
Foraging for your flowers
If you don’t have Wisteria growing near you, no problem! You can forage any seasonal blooms to create this recipe! Just make sure you don’t just go rubbing random plants on yourself. Do a little research first. My favorite plant identifier is Pl@ntNet. Once you properly identify your flower, search for it’s skin benefits (or lack-there-of), to be sure you are safe!
When foraging for Wisteria, keep the following in mind:

Grab your Free Routine
The 15 Minute Homestead Routine (for busy days).
Want a simple morning rhythm that keeps your home running, your garden growing, and your goals on track? Grab my free 15-Minute Morning Routine Worksheets—designed to help you build homestead habits that stick.
- Timing: Wisteria flowers typically bloom in the spring, so make sure you are foraging at the right time. Depending on your location, this may be anywhere from early March to early June.
- Identification: Before you start foraging, make sure you can correctly identify the plant. Wisteria flowers have a distinct purple or white color and a sweet fragrance. The leaves are compound and can have anywhere from 9 to 19 leaflets.
- Permission: Make sure you have permission to forage on the land where the Wisteria is growing. If it is on private property, be sure to ask the owner for permission.
- Sustainability: Only take what you need and leave some flowers behind for the plant to continue to reproduce. Do not damage the plant or its surroundings while foraging. Always remember, take what you need and leave the rest for the bees!
- Safety: Be careful bringing Wisteria into your home. The petals are safe, but the seed pods and rest of the plant are technically poisonous if ingested. Be careful around small children or pets. If you have allergies or are unsure if you are allergic to Wisteria, do not consume them.
As an Amazon Associate, I earn from qualifying purchases. Please visit my privacy + disclosure page for more details.
Wisteria Lotion Bar Recipe
Ingredients
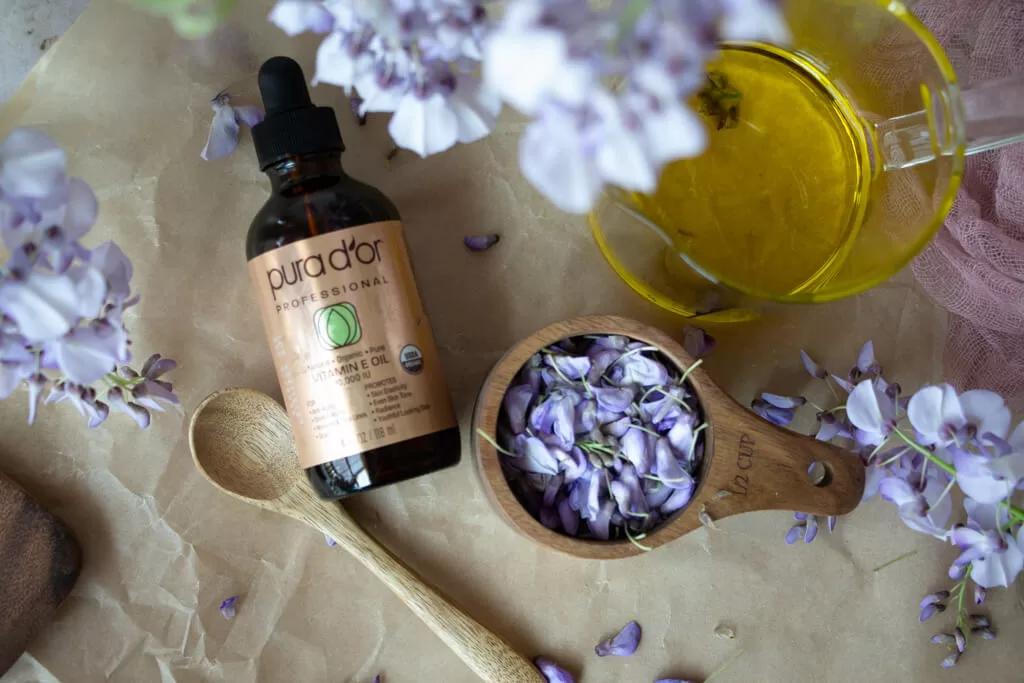
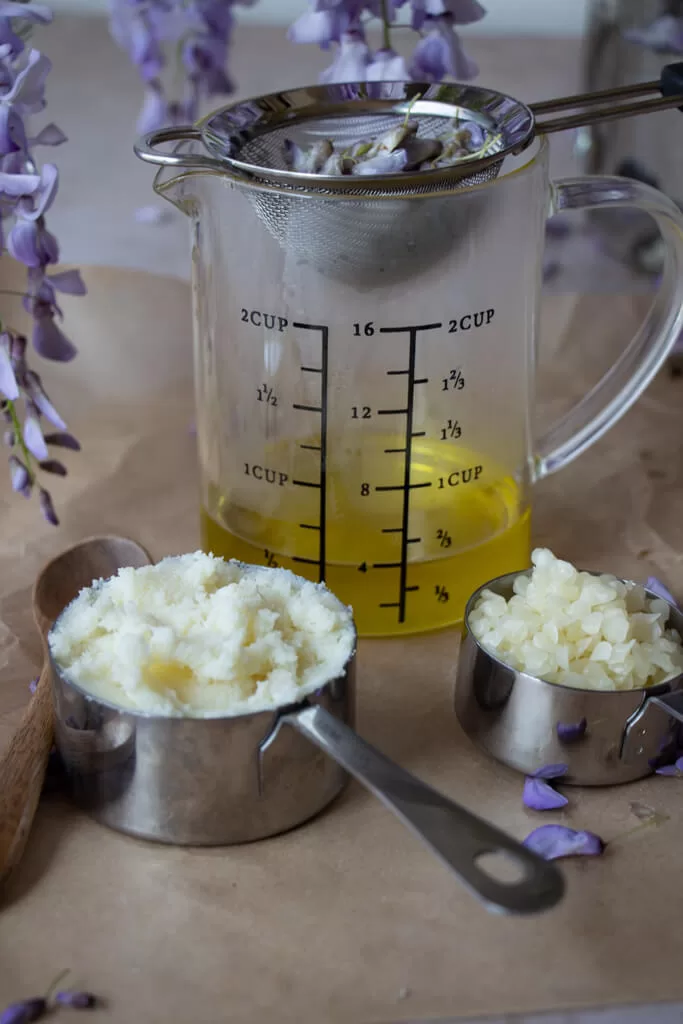
- 1/4 cup olive oil
- 1/4 cup sweet almond oil
- 1/2 TBSP vitamin e oil (a natural preservative)
- 1/2 cup wisteria petals
- 1/2 cup shea butter
- 1/2 cup beeswax pellets (maybe even a TBSP more if your house is extra warm!)
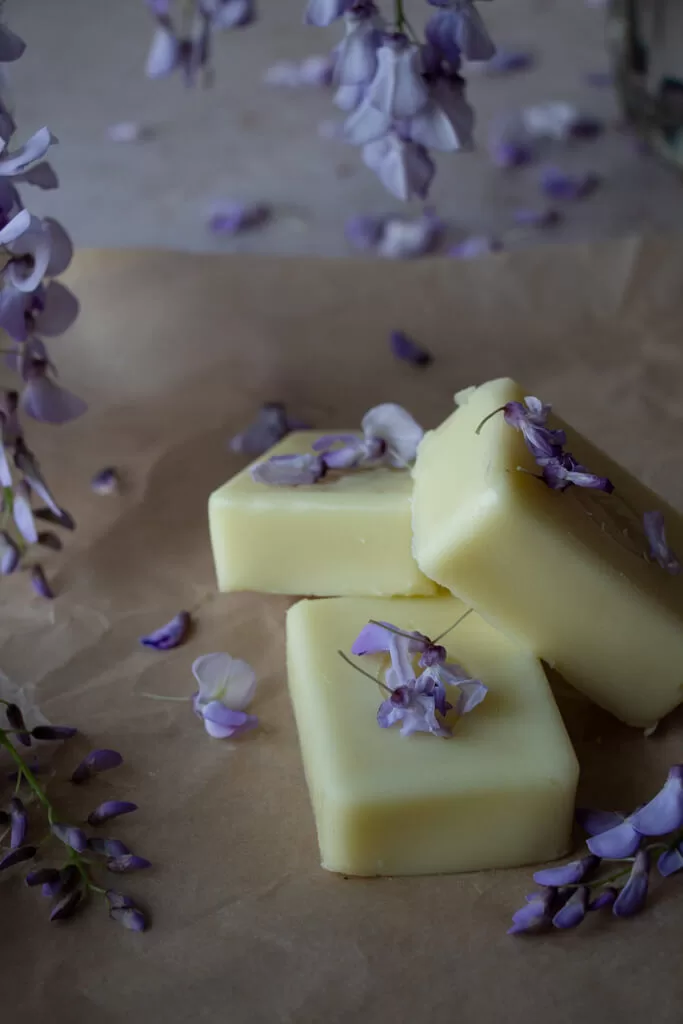
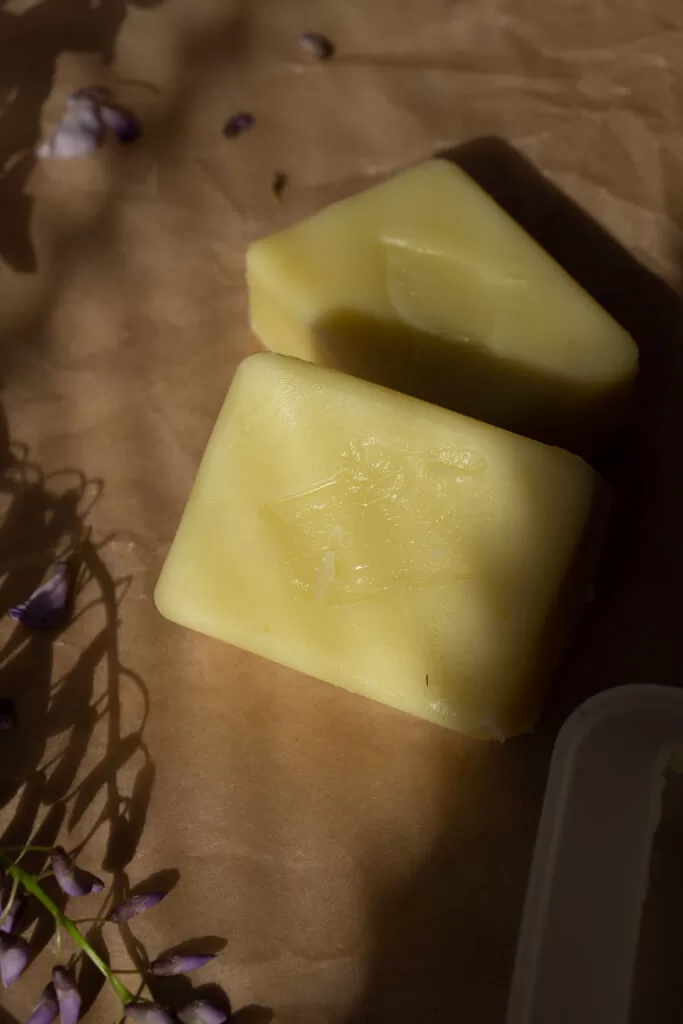
This yields about 3, 4 oz bars.
Note: The final product only has a light floral fragrance. If you want this to be more scented, you can add in a few drops of essential oils if you use them.
Supplies:
- Jar
- Strainer
- Funnel
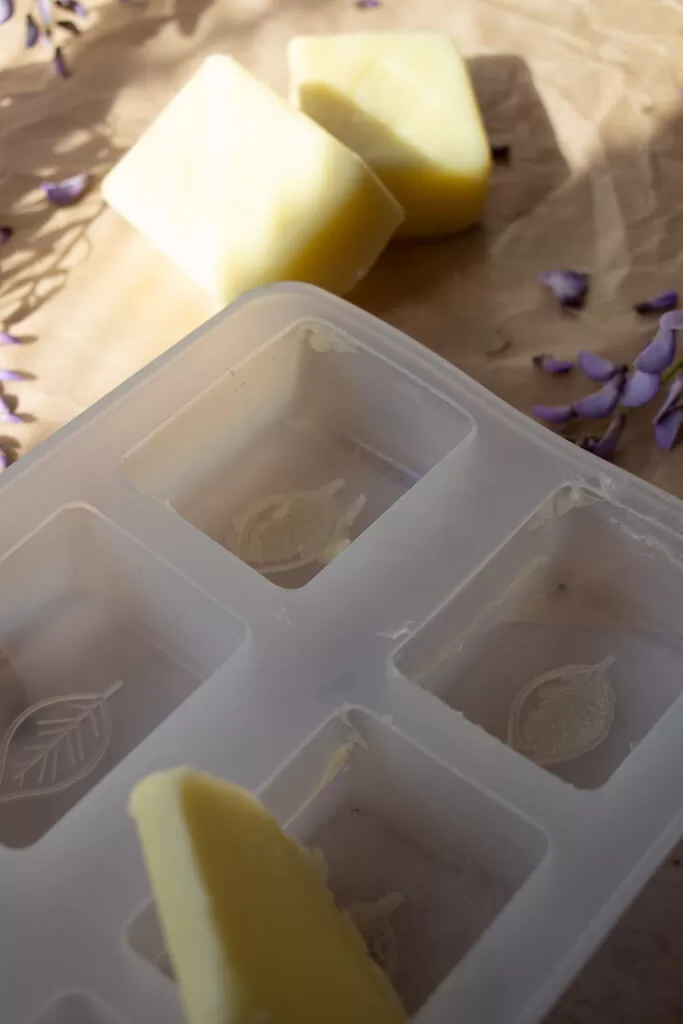
- Silicone Soap Mold
- Double Boiler
As an Amazon Associate, I earn from qualifying purchases. Please visit my privacy policy page for more details.
- Measuring cups and spoons
- Stirring utensil (I prefer a silicone spatula for this)
The lotion bar mold I used for this recipe came from Michael’s, but I linked to another gorgeous option from Amazon above!
Recipe
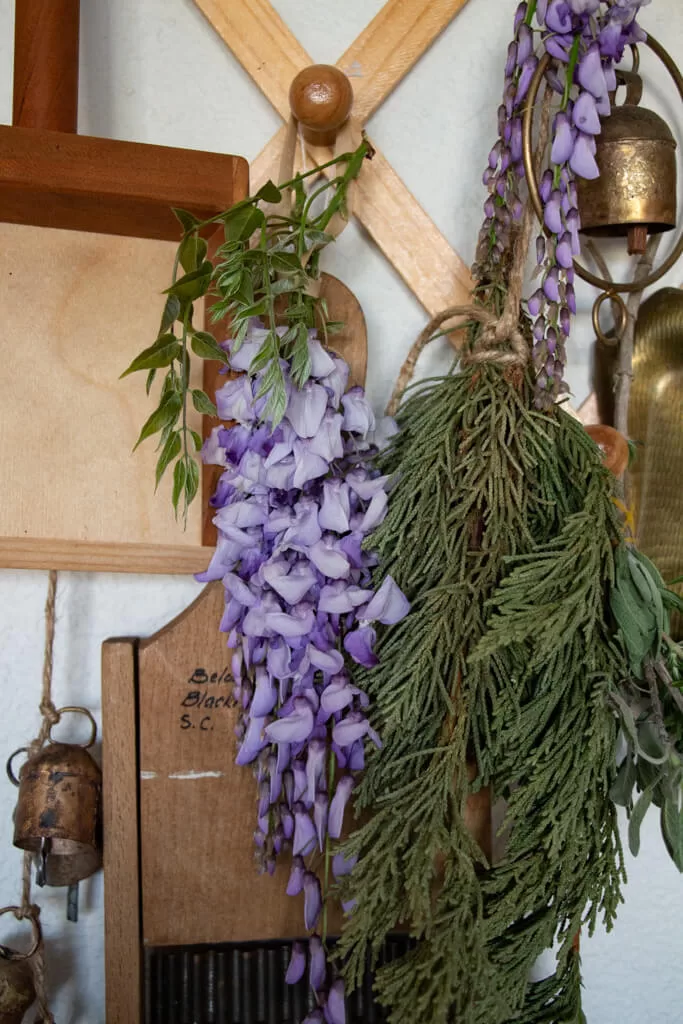
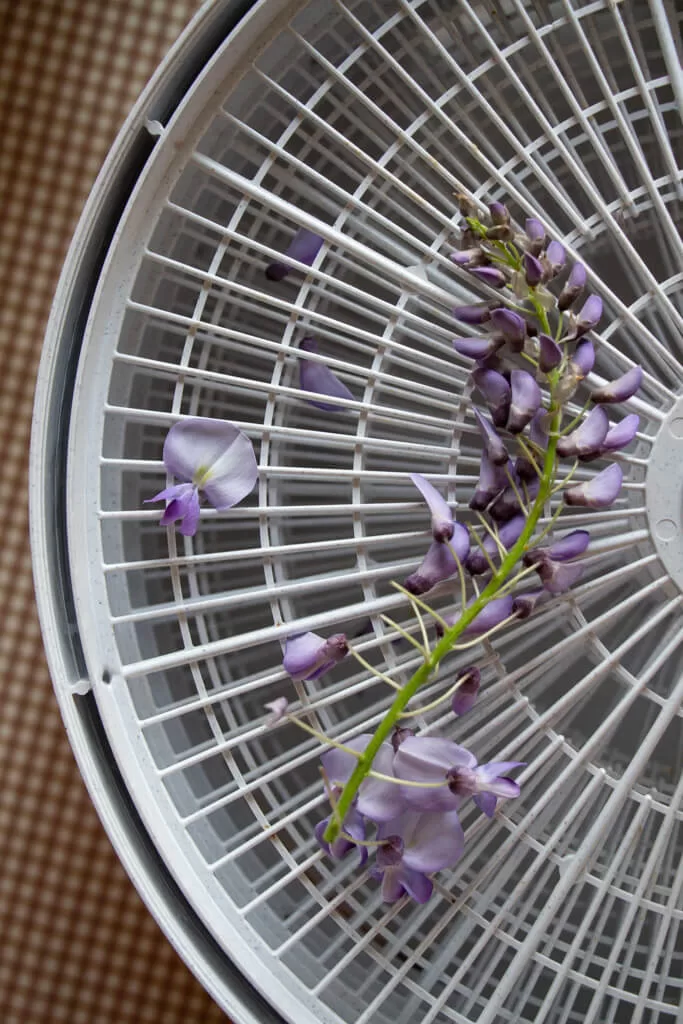
Step 1: Dry the Petals
You do not have to dehydrate the flowers completely, but when infusing fresh plants, it is always a good idea to reduce the moisture content as much as possible to be sure the oil doesn’t go rancid.
You can let the flowers wilt for 12 hours first, or pop them in a dehydrator for 2-3 hours.
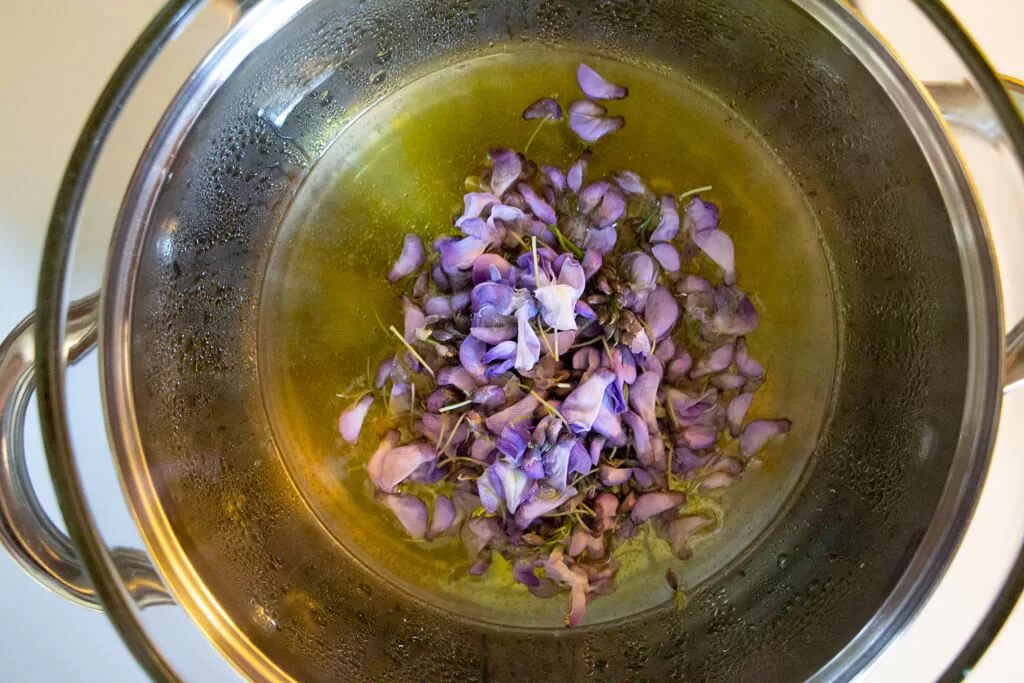
Step 2. Infuse the oil using a Heat Infusion
Heat infusion is a great fast way to infuse your herbs. Some herbalists don’t like it as it can kill off some of the good properties in the herbs or flowers. Be sure to take your time and not over-heat the oil.
Heat Infusion Steps
1. In a double boiler As an Amazon Associate, I earn from qualifying purchases. Please visit my privacy policy page for more details.
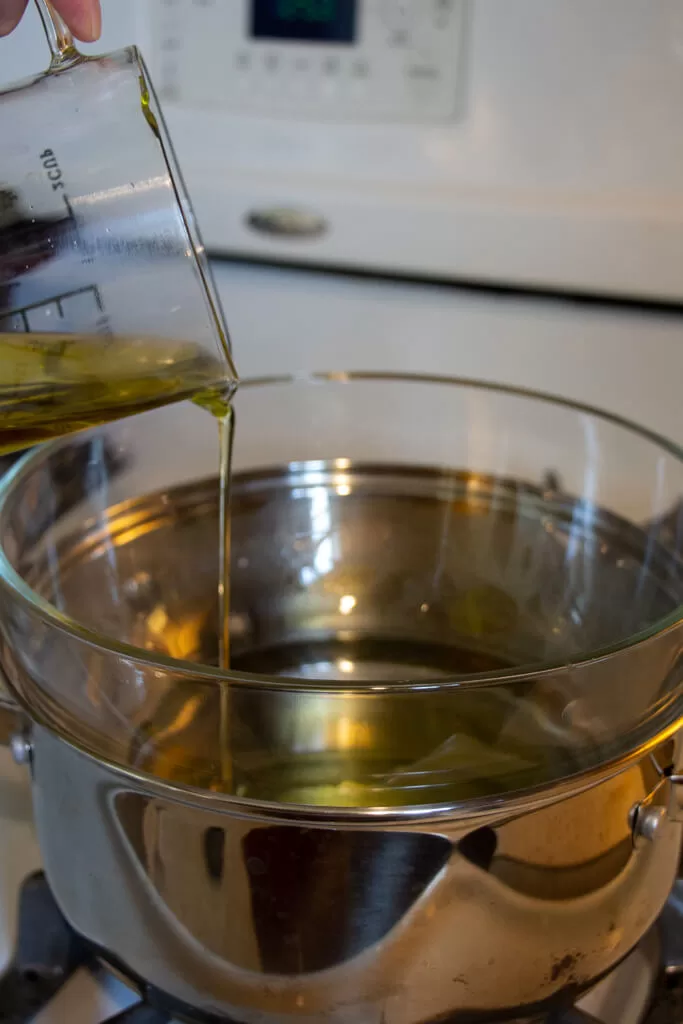
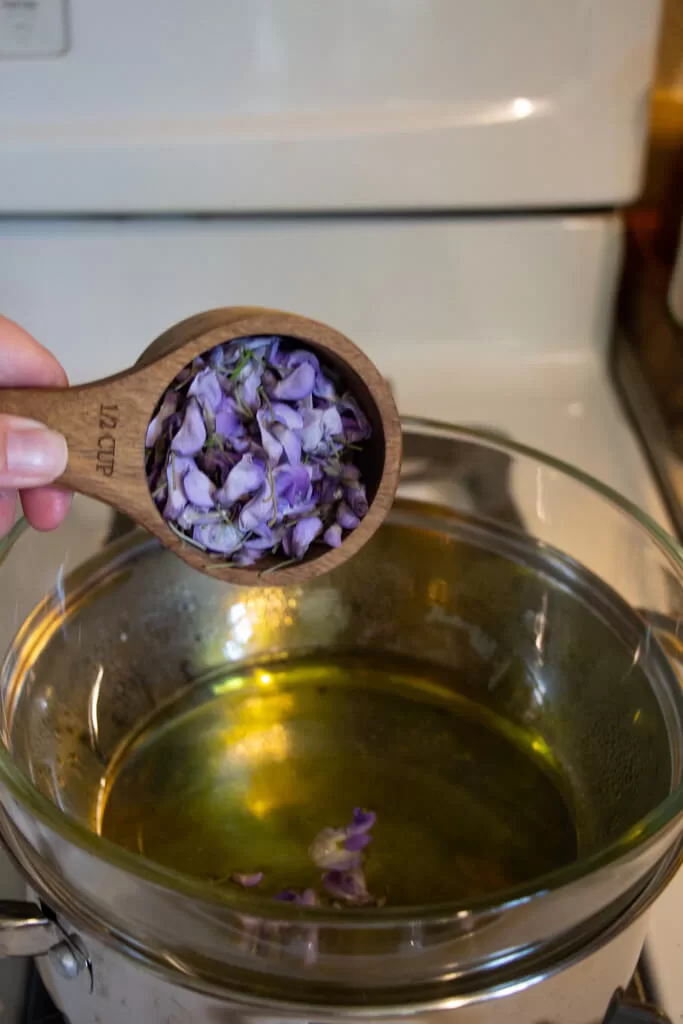
2. Simmer (just barely) for about 30 minutes to an hour (until the petals are fragrant). If you have the time, you can infuse these for much longer (up to 8 hours) at very low heat.
3. Strain the petals with a fine mesh strainer As an Amazon Associate, I earn from qualifying purchases. Please visit my privacy policy page for more details.
Double Boiler As an Amazon Associate, I earn from qualifying purchases. Please visit my privacy policy page for more details.
I’m new to making DIY lotion bars, so I made a major mistake! Learn from what I did and use the simple correction to make sure you aren’t wasting precious time.
Step 3 Make the lotion bars
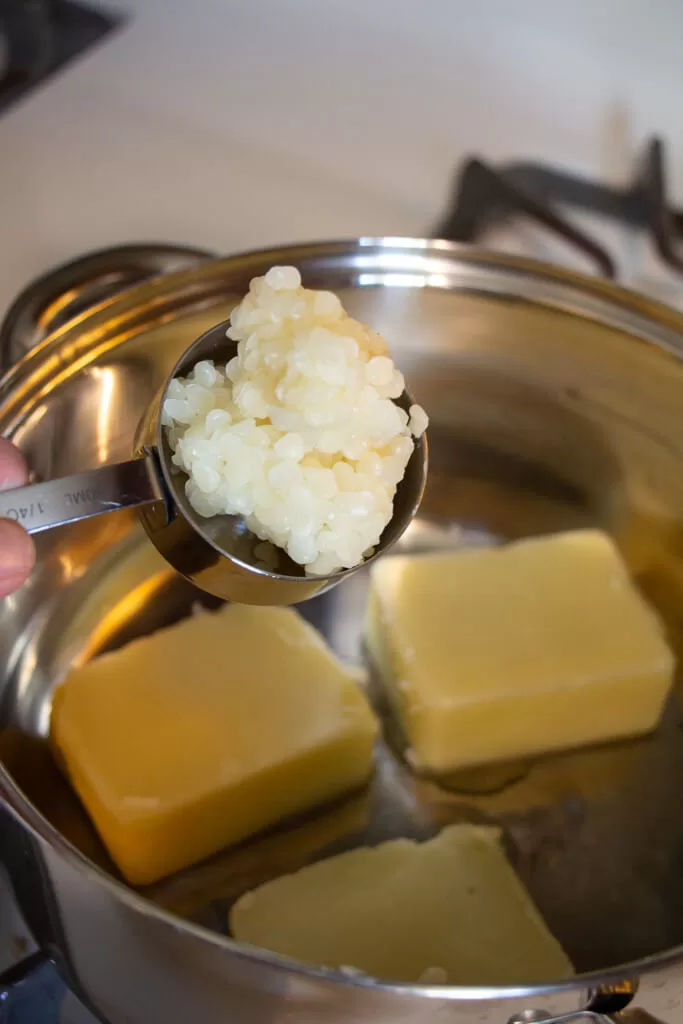
1.Prepare a double boiler by filling a saucepan with a few inches of water and placing a heatproof bowl on top of the saucepan.
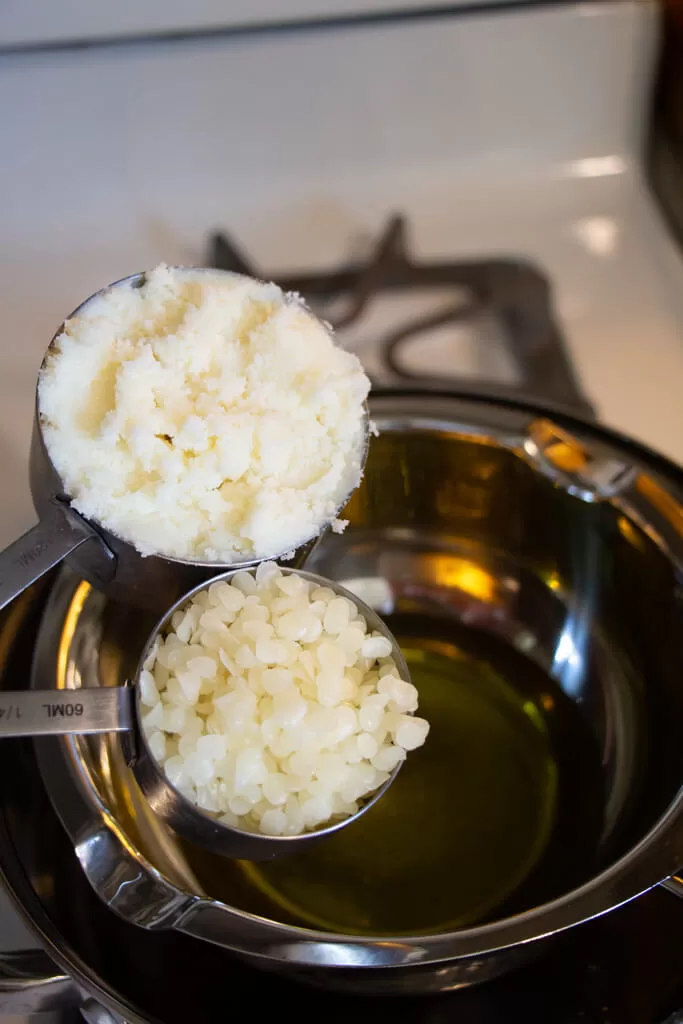
2. Add the wisteria infused oil, shea butter, and beeswax pellets to the bowl and heat over medium heat, stirring occasionally until melted and well combined.
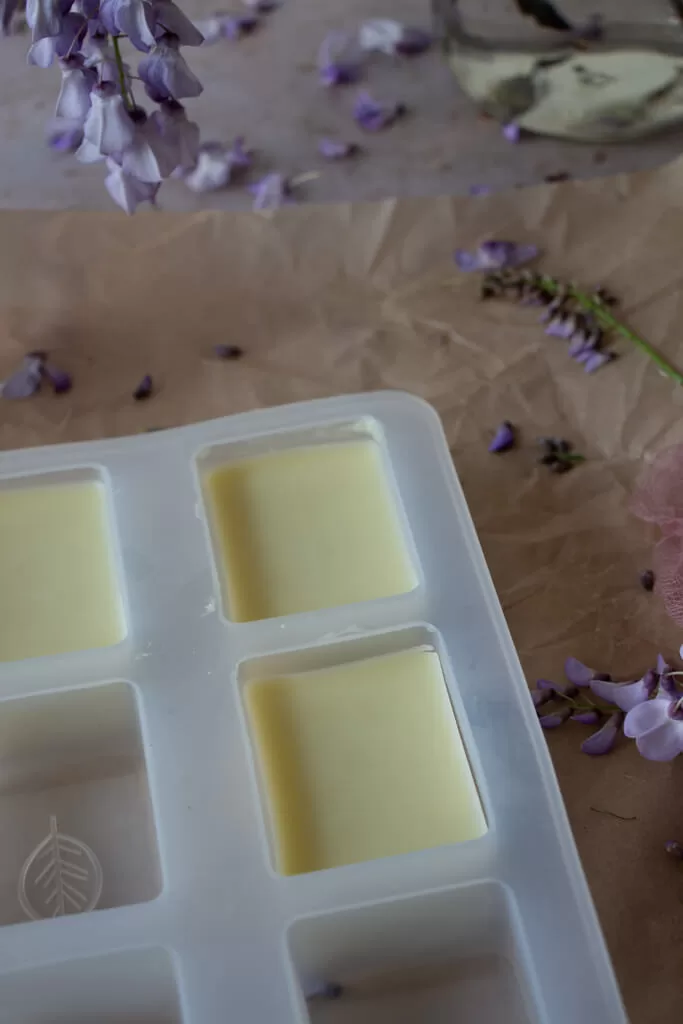
3. Pour the mixture into a silicone mold or empty container and let it cool for at least an hour 3 hours until it solidifies (overnight preferred).
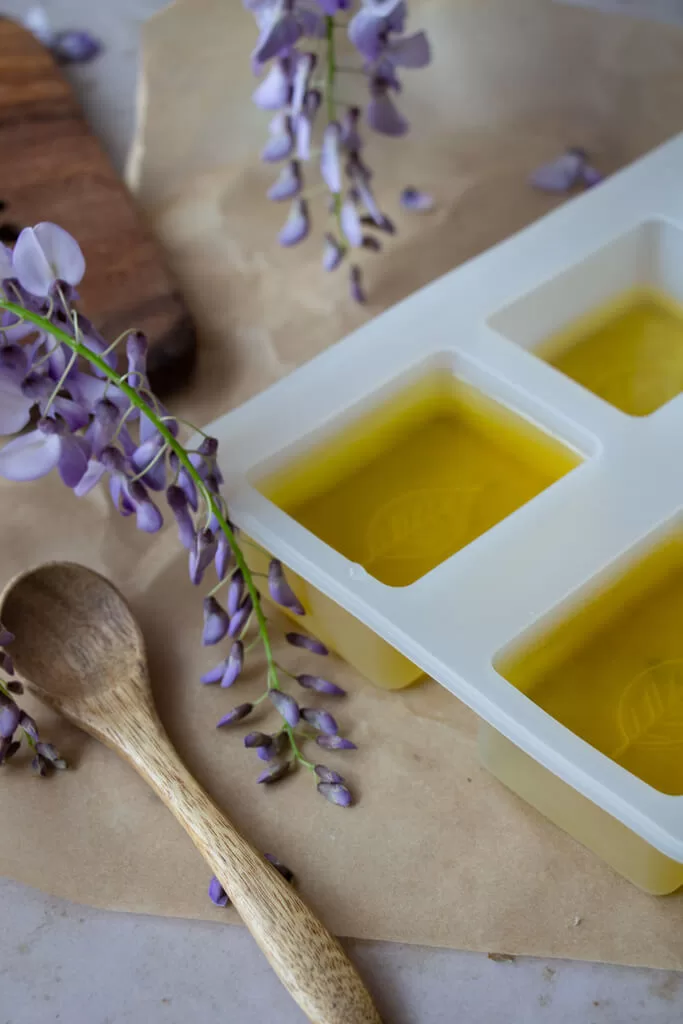
4. Once solid, remove the lotion bars from the mold or container and store in a cool, dry place.
I could have ended the post here and pretended like I did not make any mistakes… but that would be a lie!
I had to add in a few extra steps to make these right! If yours don’t harden, all is not lost! Simply add back to the pan and add more beeswax. I originally started with 1/4 cup beeswax, then added another 1/4 cup (final recipe above is adjusted!).
The final product started to harden much sooner this time. You will need to wait several hours for these to fully harden. I still took mine out a tad too early as I was eager to photograph them! Ideally, wait overnight for these to fully harden.
How to Use Lotion Bars
To use, rub the lotion bar between your hands to soften it and apply to dry skin as needed.
Lotion bars are often used to moisturize dry skin, particularly areas that are prone to cracking and roughness, such as elbows, knees, and heels. They can also be used on other areas of the body, such as the hands and face.
If you aren’t used to using natural ingredients in your body care routine, you might feel a little greasy at first until you get used to using oils in your lotion. I think you will be shocked by how you don’t have to reapply this every five seconds. It truly works to heal your skin.
Storage
Proper storage is important to help your DIY lotion bar last longer and maintain its quality. Here are some tips on how to store a DIY lotion bar:
- Keep it in a cool, dry place: Store your lotion bar in a cool, dry place away from direct sunlight or heat. Heat can cause the bar to melt, and exposure to sunlight can cause the oils in the bar to go rancid.
- Use a container with a lid: Store your lotion bar in a container with a tight-fitting lid to help prevent moisture and dust from getting in. Glass or metal containers are ideal because they are less likely to absorb odors or chemicals from the ingredients in the bar.
By following these storage tips, you can help extend the shelf life of your DIY lotion bar and ensure that it stays fresh and effective for as long as possible.
Generally, a well-made lotion bar can last anywhere from 6 months to a year, but it’s important to monitor its texture, scent, and appearance to determine if it’s still good to use.
Common Lotion Bar Mistakes
There are two common lotion bar mistakes: not using enough beeswax and pulling your bar from the mold too soon. I made both of these mistakes!
Common Lotion Bar Mistake 1: Not Using Enough Beeswax
First, I did not use enough beeswax! I followed some popular online recipes to craft my own version… and little did I know, you MUST do equal parts of the beeswax, shea butter, and oil. At first, I used only 1/4 cup beeswax, and that was not enough to fully harden the bar. It was more like a salve.
Common Lotion Bar Mistake 2: Removing the Bar From the Mold Too Soon
In both attempts (before and after the addition of beeswax), I pulled the bars from the molds too soon. I got antsy! The next morning, my bars were much harder and ready to use. Have patience, my friends (unlike me).
Wisteria Benefits
Wisteria is a beautiful flowering plant that belongs to the pea family. While it is known for its ornamental value, some parts of the plant are also used for medicinal purposes in traditional medicine. Here are some potential herbal benefits of wisteria:
- Anti-inflammatory properties: The roots, stems, and leaves of wisteria contain compounds that may have anti-inflammatory effects. These properties may be helpful in reducing inflammation and pain in conditions such as arthritis and other inflammatory disorders.
- Antioxidant: May help protect cells from damage caused by oxidative stress.
It’s worth noting that there is limited scientific research on the potential health benefits of wisteria, and it should not be used as a replacement for medical treatment. As with any herbal supplement, it is important to consult with a healthcare provider before using wisteria for medicinal purposes.
Pin it for Later!
FAQs
Have you ever made DIY lotion bars? I hope this wisteria lotion bar recipe inspires you to forage the season and create something pretty and beneficial for your skin! If you make a lotion bar with your local spring blooms, please tag me on Instagram!
About the Author
Brittany Gibson is a modern suburban homesteader and the founder of The Homestead Challenge. She empowers women to adopt a simpler, more self-sufficient lifestyle, feeling confident to grow, create, and thrive on their own terms with joy and balance.
Read more about my transformation and join me in building our lives from scratch.

DIY Wisteria Lotion Bars
Equipment
- Jar
- Strainer
As an Amazon Associate, I earn from qualifying purchases. Please visit my privacy policy page for more details.
- Funnel
- • Silicone Soap Mold
- Double Boiler
- Measuring Cups and Spoons
- • Stirring utensil (I prefer a silicone spatula for this)
Ingredients
- • 1/4 cup olive oil
- • 1/4 cup sweet almond oil
- • 1/2 TBSP vitamin e oil a natural preservative
- • 1/2 cup wisteria petals
- • 1/2 cup shea butter
- • 1/2 cup beeswax pellets maybe even a TBSP more if your house is extra warm!
Instructions
- Step 1: Dry the herbs
- You can let the flowers wilt for 12
hours first, or pop them in a dehydrator for 2-3 hours. - Step 2: Infuse the oil using a Heat Infusion
- In a double boiler, gently heat
olive oil, sweet almond oil, vitamin e oil, and petals. - Simmer (just barely) for about 30
minutes to an hour (until the petals are fragrant). - Strain the petals with a fine
mesh strainerAs an Amazon Associate, I earn from qualifying purchases. Please visit my privacy policy page for more details.
or cheese cloth into another bowl. - Step 3: Make the lotion bars
- Prepare a double boiler by filling
a saucepan with a few inches of water and placing a heatproof bowl on top of
the saucepan. - Add the wisteria infused oil,
shea butter, and beeswax pellets to the bowl and heat over medium heat,
stirring occasionally until melted and well combined. - Pour the mixture into a silicone
mold or empty container and let it cool for at least an hour 3 hours
until it solidifies (overnight preferred). - Once solid, remove the lotion
bars from the mold or container and store in a cool, dry place.
One Comment