
How to Make Simple Flavorful Chive Salt
Chives are one of my favorite herbs to grow. They’re unfussy, come back every year, and somehow make everything from scrambled eggs to roasted veggies feel a little fancier. If you’ve got a patch of chives that’s going wild right now, this is such a fun way to preserve some of that flavor: homemade chive salt.

It’s ridiculously easy, even if (like me) you don’t have a fancy food processor. Here’s how I do it—and a few tips to make sure your salt doesn’t get soggy or clump up over time.
What You’ll Need
- A bunch of fresh chives
- Kosher or sea salt (something with a bit of texture)
- Blender (or food processor if you have one)
- Dehydrator or oven
- Parchment paper

Recommended Chive-to-Salt Ratio
¼ cup fresh chopped chives to 1 cup coarse salt (like kosher or sea salt)
- More chives = bolder flavor + greener salt (but it may take longer to dry).
- Less chives = milder flavor + quicker drying time.
Step-by-Step Instructions
1. Harvest and Prep Your Chives

Cut your chives with clean sharp snippers or scissors right at the base. I left all of my soon-to-be-chive blossoms for another project!
Give your chives a rinse and pat them dry—really dry. Excess moisture can make your salt clumpy later, so don’t skip this step.
2. Wilt chives for up to 8 Hours.

Wilting herbs simply means letting them dry out a bit before use. They will become limp, but also contain less moisture. This will drastically reduce the time you need to dry the final product.

Grab your Free Routine
The 15 Minute Homestead Routine (for busy days).
Want a simple morning rhythm that keeps your home running, your garden growing, and your goals on track? Grab my free 15-Minute Morning Routine Worksheets—designed to help you build homestead habits that stick.
3. Blend with Salt


Toss the chives into a blender with your coarse salt. Blend until the mixture turns a beautiful green and the chives are fully broken down. You don’t have to pre-chop your chives- I did in this case so I could measure!
🧂 Note: A food processor will give a slightly more even texture, but a blender totally works—you might just need to scrape down the sides a few times.
4. Dry It Out


Spread your green salt mixture in a thin layer on a dehydrator tray or a baking sheet lined with parchment paper.
- Dehydrator: Use the herb setting (usually around 95–115°F) and dry until completely crisp—this can take 4–6 hours.
- Oven method: Set your oven to the lowest possible temperature (mine goes to 170°F) and prop the door open with a wooden spoon to let moisture escape. Check and stir every 30 minutes. It usually takes 1.5–2 hours, depending on how wet your salt is. You may lose more of the bright green color if using the oven.
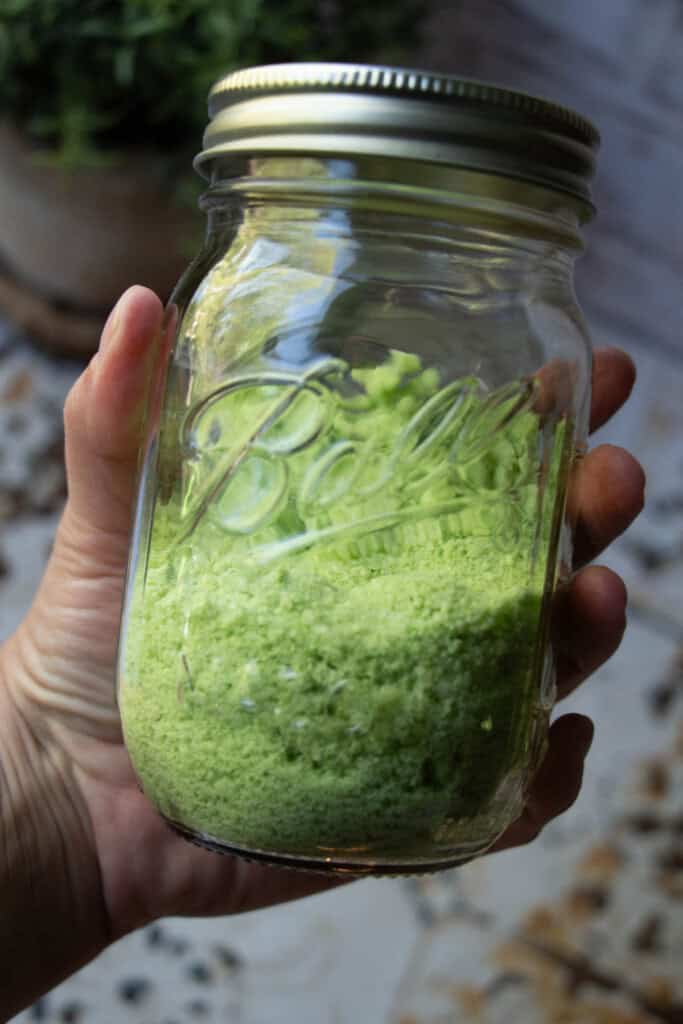
5. Cool, Then Store
Let the salt cool completely before transferring it to an airtight jar. If you skip this, residual warmth can create condensation = clumps.
Tips to Avoid Moisture & Clumping
- Dry your chives really well before blending. Think: bone dry, not just “damp from a towel.”
- Make sure the salt is fully dry before storing. You want it to feel dry and sandy—not tacky or soft and mushy.
- Store it in a cool, dry place. A spice jar with a desiccant pack (like the kind from vitamins) can help if your kitchen runs humid.
- If it clumps later, no big deal. Just break it up with a spoon or give the jar a good shake.

Ways to Use Chive Salt
- On scrambled eggs or omelets
- Sprinkled over roasted potatoes or veggies
- On popcorn (yes, really)
- Mixed into compound butter
- Rim of a Bloody Mary glass
Do Chives Have Any Herbal Benefits?
They sure do! Chives belong to the allium family (like garlic and onions), and while they’re much milder, they still offer some gentle support for wellness:
- Mild Antibacterial Properties: Like their cousins, chives contain compounds that may help inhibit certain bacteria.
- Digestive Support: Traditionally, chives have been used to stimulate appetite and support digestion—especially in rich meals.
- Rich in Antioxidants: Chives contain vitamin C, carotenoids, and flavonoids, which may help fight oxidative stress in the body.
- May Support Heart Health: Thanks to their sulfur compounds (similar to garlic), chives might offer mild cardiovascular benefits, like helping to maintain healthy cholesterol levels.
That said, you’d need to eat quite a bit of them to get strong medicinal effects. But incorporating chive salt into your everyday cooking? A tasty way to add a little extra plant power to your meals.
Add a Homegrown Twist to Everyday Meals
This is such a fun little kitchen project is a great way to make use of that bumper crop of chives before they flower. If you make a batch, I’d love to hear how you use it!
And if you’re into small-batch preserving like this, check out some of my other favorite ways to preserve your harvest!
Our Favorite Ways to
Preserve Your Harvest
Pin it for Later!


About the Author
Brittany Gibson is a modern suburban homesteader and the founder of The Homestead Challenge. She empowers women to adopt a simpler, more self-sufficient lifestyle, feeling confident to grow, create, and thrive on their own terms with joy and balance.
Read more about my transformation and join me in building our lives from scratch.

Chive Salt
Equipment
- 1 Dehydrator An oven works too!
Ingredients
- 1/4 cup chopped chives
- 1 cup coarse sea salt
Instructions
- Harvest and Prep Your Chives. Cut your chives with clean sharp snippers or scissors right at the base.
- Wilt chives for up to 8 Hours.
- Blend with Salt. Toss the chives into a blender with your coarse salt. Blend until the mixture turns a beautiful green and the chives are fully broken down.
- Dry It Out. Spread your green salt mixture in a thin layer on a dehydrator tray or a baking sheet lined with parchment paper.Dehydrator: Use the herb setting (usually around 95–115°F) and dry until completely crisp—this can take 4–6 hours.Oven method: Set your oven to the lowest possible temperature (mine goes to 170°F) and prop the door open with a wooden spoon to let moisture escape. Check and stir every 30 minutes. It usually takes 1.5–2 hours, depending on how wet your salt is. You may lose more of the bright green color if using the oven.
- Cool, Then Store. Let the salt cool completely before transferring it to an airtight jar. If you skip this, residual warmth can create condensation = clumps.