
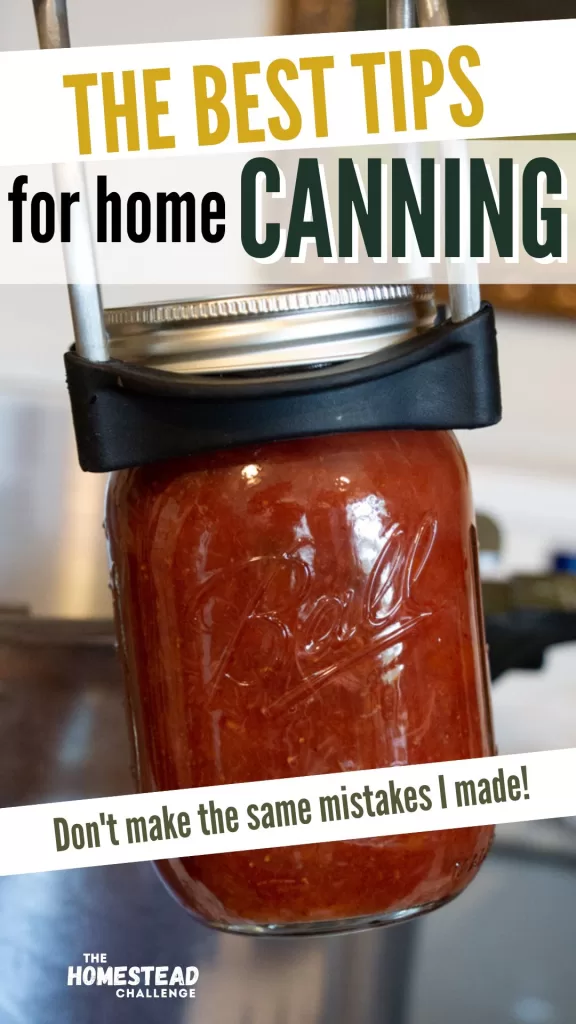
Canning Tips: Essential Guide for Preserving Your Food Safely
Canning food is one of my favorite ways to preserve the flavors of fresh, seasonal produce for later enjoyment. As the days grow warmer and gardens begin to burst with bountiful harvests, many of us eagerly reach for our canning jars, eager to capture the essence of summer in a jar. Whether you are brand new to canning or simply need a refresher, I hope these canning tips help you have a smooth and bountiful canning season!

5 Canning Mistakes I Made So You Don’t Have To
Listen to the podcast below while you read my best tips! Don’t worry, mistakes will happen on the homestead, we’ve all been there!
If you’re new to canning or looking to brush up on your skills, I’m here to share some helpful tips and techniques to ensure you have a successful canning experience. Mind you, I just started only one year ago… But that means that all the mistakes I’ve made are fresh in my mind and I am happy to share them!
The Best Canning Tips
Home Food Preservation
Canning is an excellent way to preserve your garden’s surplus and the flavors of the season. My garden is not big enough to produce enough to can (yet), but I love to bring my family to the local farm to get the freshest produce to enjoy all year. Not only does it save me money, it also provides me with a sense of accomplishment. Through canning, I can safely store my produce for an extended period of time without sacrificing its taste or nutrition.
Here are a few of the canning projects from my first year of canning (pre-blog).
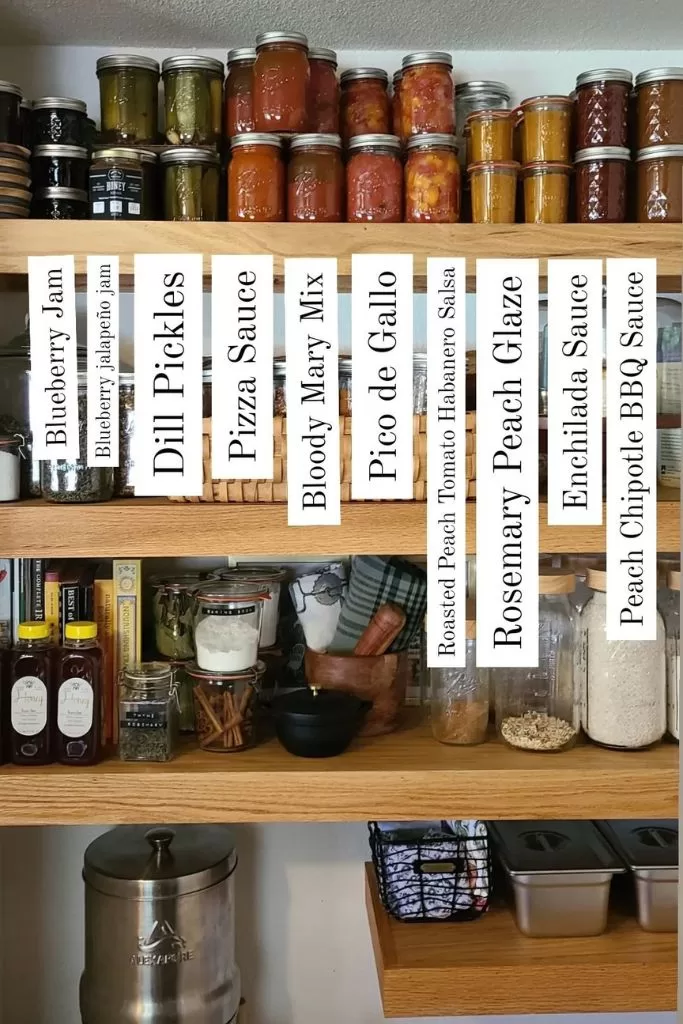 Pantry Shelves
 Pizza Sauce
 Peach Habanero Salsa
 Pickles
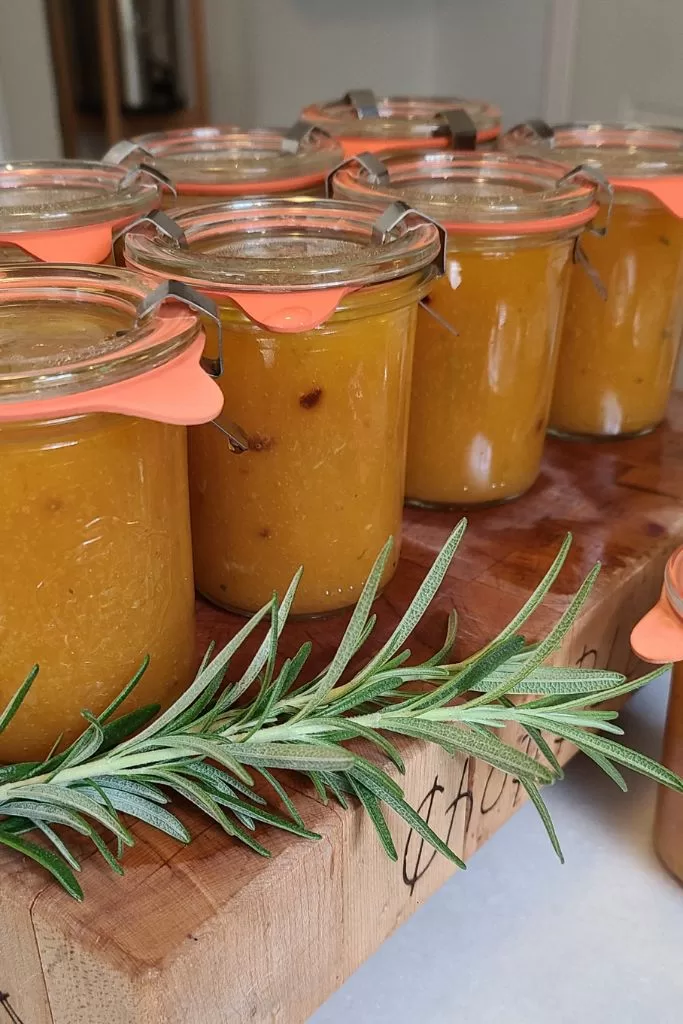 Rosemary Peach Glaze
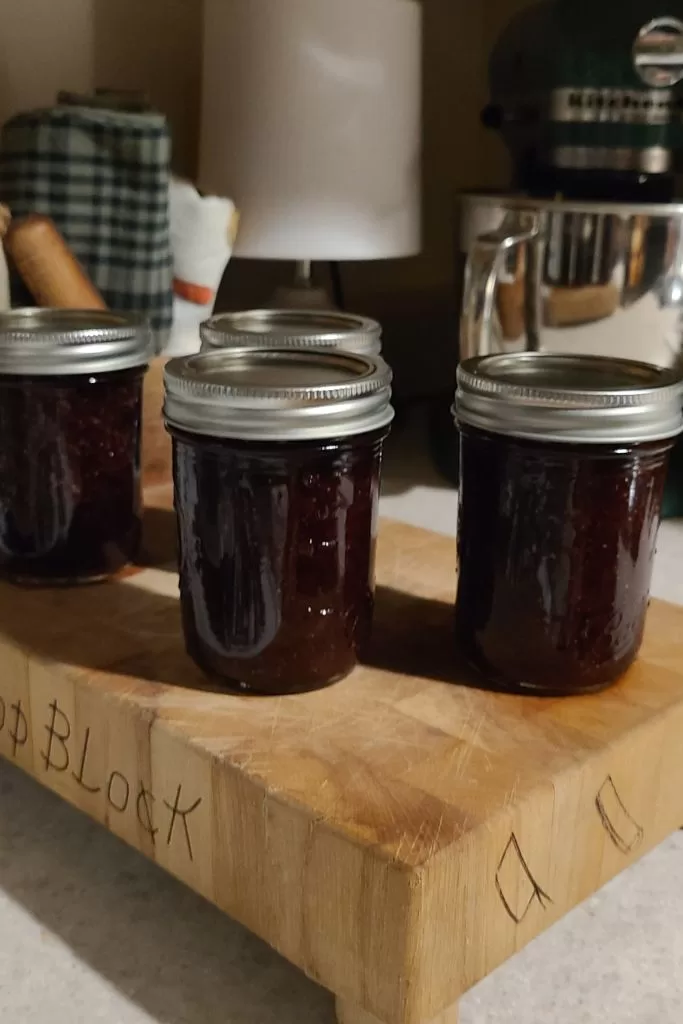 Strawberry Jam
 Chicken Noodle Soup
 Husband Helping
 Blueberry Jam
Canning Equipment
As an Amazon Associate, I earn from qualifying purchases. Please visit my privacy + disclosure page for more details.
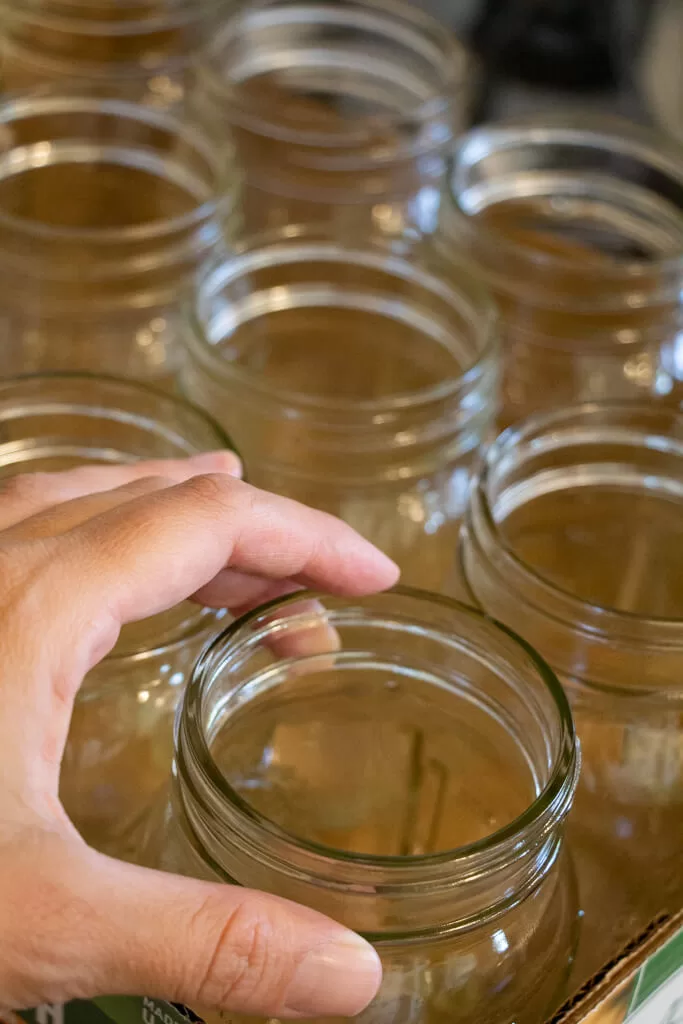
Jars and Lids

When it comes to canning, I always make sure I have appropriate canning jars, such as mason jars, readily available. It’s essential to use jars specifically designed for canning as they can withstand the high temperatures involved in the canning process.
You can usually find mason jars in various sizes at your local grocery store or hardware stores (even Target and Walmart). I am not even going to add an Amazon link for jars here because they are ALWAYS more expensive there.
Wide Mouth vs Regular Mouth Canning Jars
The main difference between wide-mouth and regular-mouth jars is the size of the opening at the top of the jar. Wide-mouth jars have a larger opening, while regular-mouth jars have a smaller opening.
Here are some general differences and considerations when choosing between wide-mouth and regular-mouth canning jars:
- Wide-mouth jars are easier to fill and empty, making them a better choice for larger items, like whole fruits or vegetables, or chunky sauces or preserves.
- Regular mouth jars are better suited for liquids, like soups, broths, or pickling brines, since the smaller opening helps keep the contents from spilling or sloshing out.
- Wide-mouth jars can be easier to clean, especially if you plan to reuse them frequently.
- Regular mouth jars are more versatile in terms of lids and accessories, since there are more options available that fit their smaller size.
Ultimately, the choice between wide-mouth and regular-mouth jars will depend on the specific needs and preferences of the individual canner.
Canning Jar Lids and Rings
- Lids: These should always be new to ensure an airtight seal. Discard or use for dry storage items after use. There is a special reusable kind that you can purchase if you want to be more sustainable (but they are definitely more expensive).
- Jar rings: They hold the lids in place during processing and can be reused.
Canners
- Large pot or boiling water bath canner: This is a must-have for canning any kind of food. It’s important to choose a pot big enough to hold all your jars and submerge them fully in water.
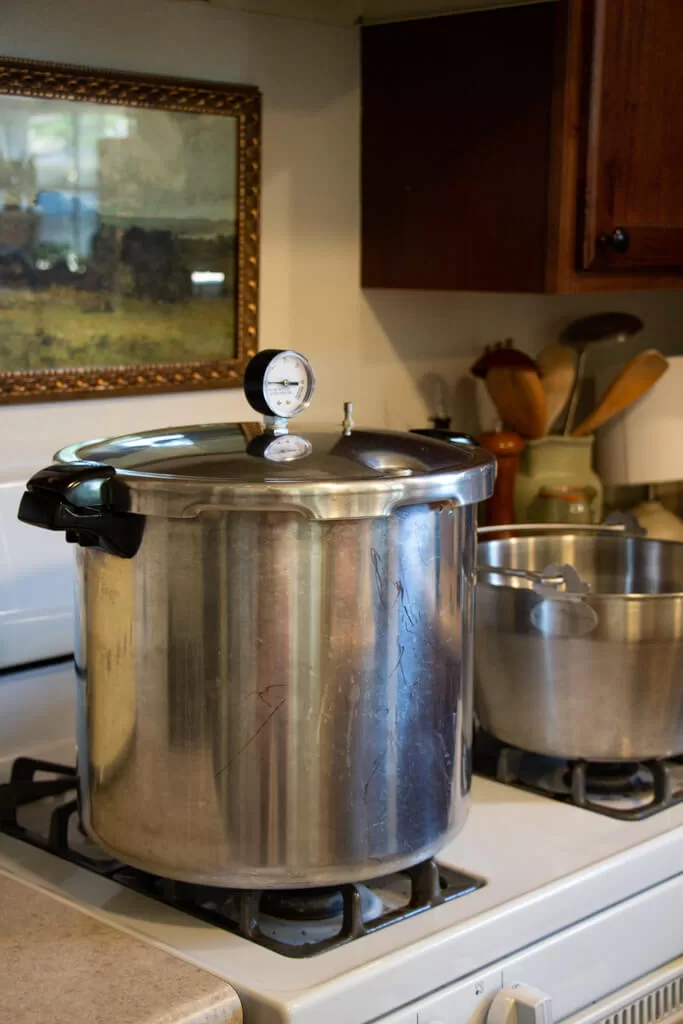
- I personally have the Presto 23 Quart Induction Compatible Pressure Canner and love it. Many people jump to purchase the All-American, and I don’t think it is necessary for function. Only buy it if you have the money and want to support the company.

Pro Canning Tip
When purchasing a canner, just buy a pressure canner (unless you never plan to pressure can). I have seen people time and time again start with a water bath canner, then decide to purchase a pressure canner shortly after. You can use a pressure canner as a water bath canner! Save yourself the space and money, and just buy one.
Canning Tools

- Jar lifter: This tool helps safely lift hot jars out of boiling water. Don’t skimp here. Get the good one. You don’t want to risk dropping those precious jars! The Ball Secure-Grip Jar Lifter is hefty.
- Magnetic lid lifter: I find this tool especially handy for placing lids on jars without touching them. These usually come with a canning kit of some sort. I am adding it here because it is recommended, but I almost never use mine.
- Bubble Popper/Measurer: This is the easiest way to ensure you have the proper head space, and it doubles as a bubble popper. You actually DO need this one.
- Canning Funnel: It honestly doesn’t matter which canning funnel you buy. Just be sure to not use a standard funnel. A canning funnel had a wide enough spout that most canned items can fit through.
By having these essential canning equipment and tools in my arsenal, I can ensure a safe and efficient canning process.
Prepping the Canning Kitchen
I’ve learned through my own canning adventures that proper preparation is the key to success. Before you begin, gather all the necessary equipment, such as pots, jars, lids, bands, and a reliable canning recipe. I even like to do this the night before and have the kitchen all ready for me in the morning!
Pro Canning Tip
I always put a baking sheet under my prep area where I plan to fill the jars. This allows for easy cleanup in case of a major spill. I also put my hot jars on the same baking sheet once processed.
Preparing Jars and Lids
Preparing your jars and lids is the key first step to successful canning.
- Start by washing jars in hot, soapy water and rinsing them thoroughly.
- Once they’re clean, heat the jars in a pot of simmering water to keep them hot until I’m ready to fill them. I use the same pot/water that I can in. This prevents them from breaking when hot food is added.
- It’s also crucial to inspect your jars for any damage, as cracks or chips can lead to spoilage or breakage.
Now that you have everything ready, it’s time to can! Always follow a reputable canning recipe to ensure food safety and optimal preservation. I cannot emphasize enough the importance of following recommended processing times and methods, as these guidelines help prevent the growth of harmful bacteria. Remember to keep a watchful eye on your jars as they process, and never be afraid to ask for help or investigate further if something doesn’t seem quite right. Happy canning!
The Canning Process
Filling Jars

Filling jars the right way ensures my canned goods last longer and retain their quality. I follow these guidelines:
- Always use hot jars for hot food. This prevents breakage due to sudden temperature changes.
- Remove air bubbles by running a non-metallic spatula around the inside of the jar after filling it with food.
- Leave the right amount of headspace (usually 1/4 to 1/2 inch) between the food and the top of the jar. This allows for proper expansion during processing.
- Wipe the jar rim with a clean, damp cloth before placing the lid on top. This ensures a good vacuum seal.
Pro Canning Tip
ALWAYS put 1-2 TBSP of white vinegar in your canning water when sterilizing jars and during processing. If you have hard water, you can end up with cloudy jars full of hard-water stains if you don’t.
Processing and Sealing
The steps below are the very basics of canning. Use the manual that came with your canner along with your reputable recipe.
High-Acid Foods and Low-Acid Foods
When it comes to canning, it’s important to consider the acidity of the foods you are preserving. High-acid foods like tomatoes, fruits, and pickles require a lower temperature, while low-acid foods like green beans, meats, and most vegetables need a higher temperature to ensure food safety.
Common Canned Goods
Here are some of the most common canned goods:
- High-acid foods (water bath canning)
- Fruits (jams, jellies)
- Tomato sauce
- Pickles
- Low-acid foods (for pressure canning)
- Green beans
- Meats
- Vegetables

Water Bath Canning
Water bath canning is perfect for high-acid foods, like fruits, pickles, and jellies. To start, gather clean jars, lids, and bands, and then:
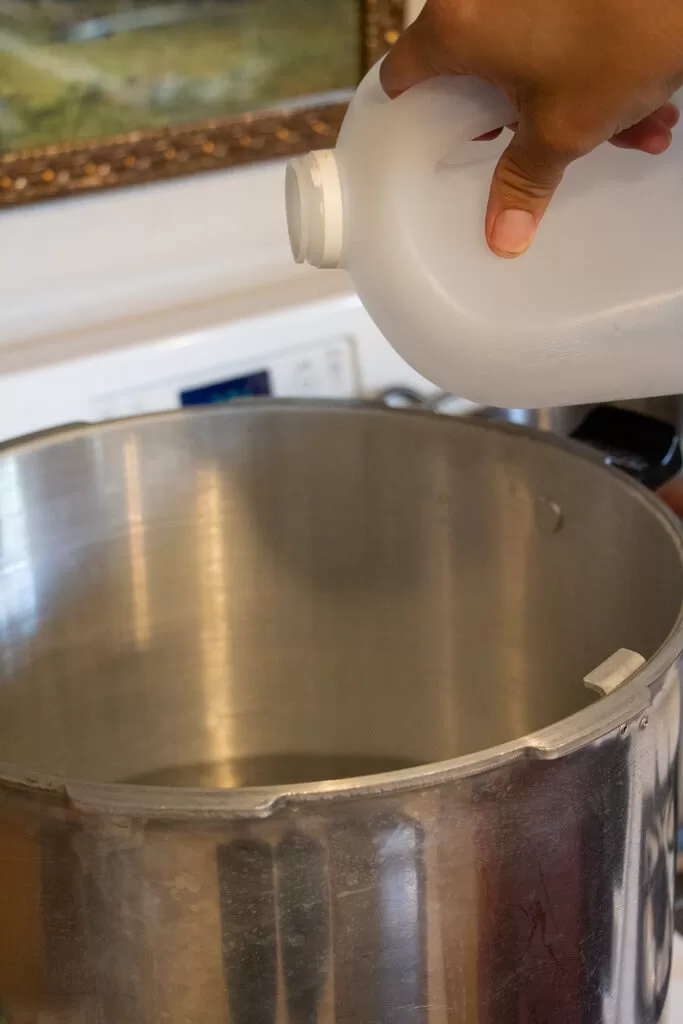
- Fill a large pot with water, making sure there is enough water to cover the jars by 2 inches.
- Bring the water to a rolling boil.
- Prepare the food according to the recipe and carefully pack it into the hot jars.
- Wipe the jar rims with white vinegar and secure the lids and bands.
- Use a jar lifter to carefully place the jars in the boiling water.
- Process the jars for the specified time in the recipe. I usually close the lid.
- Turn off the heat and remove the lid (away from your face so you don’t get a steam facial) and let the jars sit for about 5 minutes as the water cools.
- Carefully remove the jars from the water and let them cool on a towel.
Pressure Canning
Use a pressure canner when it comes to preserving low-acid foods like vegetables, meats, and poultry. This method heats the food to a higher temperature than water bath canning, which destroys bacteria and ensures safe, long-term storage. Here’s the process:
- Prepare the pressure canner, making sure the vent pipe and safety valve are clean and that the gasket is in good condition.
- Place the correct amount of water in the canner as per the manufacturer’s instructions.
- Prepare the food according to the recipe and pack it into hot, clean jars, leaving appropriate headspace.
- Wipe the jar rims with white vinegar and secure the lids and bands.
- Place the jars on the canner rack, close the lid, and increase the heat.
- Allow steam to escape for 10 minutes, and then apply the pressure regulator.
- Process the jars for the correct amount of time and pressure specified in the recipe.
- Turn off the heat and let the canner cool and depressurize completely before removing the jars.
Pro Canning Tip
The “pop” you hear when canning jars seal is a sign that the jar has been properly processed and sealed, and that the contents inside the jar are safe to store. It’s important to note that not all jars will “pop” after processing. In some cases, the lids may seal without making an audible noise.
Additionally, a jar that “pops” doesn’t necessarily mean it’s sealed properly. To ensure that your jars have properly sealed, check that the lids are concave (curved downward in the center) and don’t move when pressed. If a lid is loose or pops up and down when pressed, the jar may not have been sealed properly, and the contents should be refrigerated or reprocessed using a new lid.
Canning can be a fun and rewarding activity. By understanding these basics, anybody can create delicious, homemade canned goods to enjoy all year long.
Common Canning Mistakes and Safety
Avoiding Common Mistakes
Not Trusting the Process: Sometimes you may want to find a shortcut and want to crank up the heat or cut the processing time. Don’t do it! Just follow the recipe. The photo below is a time when I tried to crank up the heat to make my jam, thus burning the jam.

Thinking all hope is lost. If your jam doesn’t set or your jars don’t seal, it’s not a total loss! This can be saved. This article by Food in Jars talks about saving a runny jam! If your jars don’t seal, you always have to option to re-process or stick it in the fridge or freezer.
Safe Canning Practices
Following safe canning practices is essential throughout the entire canning process. Here are some of my top tips for staying safe while canning:
- Use clean jars: Always clean and sanitize your jars before filling them with food. It helps prevent contamination.
- Inspect and maintain sealing materials: Before using lids and rings, make sure they’re in good condition and free of damage.
- Adjust for altitude: If you’re canning at a high altitude, adjust your processing times accordingly to ensure food safety.
- Process foods accurately: Over-processing or under-processing your jars can lead to spoilage or unsafe food. Always follow the guide’s recommended processing time.
Food Safety Concerns
Food safety is an essential part of canning. By being aware of potential threats and monitoring the quality of canned food, I can minimize the risk of foodborne illnesses. Some crucial food safety concerns to keep in mind are:
- Botulism: A rare but serious illness that can cause paralysis. Be mindful to use an appropriate canning method (pressure cooker vs. water bath) depending on the acidity of the food being canned.
- Spoilage: Watch for signs of spoilage such as bulging lids or off odors before consuming canned goods.
- Mold growth: Mold can occur if jars are not sealed properly. If you see visible mold growth, discard the jar and its contents.
By acknowledging and addressing these food safety concerns, I am confident that my canning endeavors are not only preserving delicious food but maintaining a healthy and safe environment as well.
Canning Storage and Shelf Life
Storage Tips
It is recommended to store canned goods in a cool, dry place. I find that a dark area, like a pantry or cupboard, works best to preserve the contents’ quality. When it comes to preventing spoilage, I always make sure to avoid high temperatures, which can cause the food to lose its freshness faster. However, I truly don’t have the space for this, so most of my canned goods are on the top shelf of my open-shelf pantry (not ideal conditions).

Here’s a list of my go-to tips for storing canned goods:
- Keep the cans in a dark place to prevent exposure to sunlight
- Avoid placing them on the kitchen counter, where they can be exposed to temperature fluctuations
- Ensure the storage area is dry to avoid rust on the cans
Shelf Life and Quality
The National Center for Home Food Preservation says home canned goods should last for at least a year. However, this does not mean you have to throw them away after a year. Most likely, the quality will decline, but it should still be safe to eat if it is still sealed. if it looks weird or makes you uncomfortable, toss it!
Believe it or not, high acid foods have a shorter shelf life than low-acid foods. This one confuses me, but it’s true!
| Food Type | Approximate Shelf Life |
|---|---|
| High-acid foods | 12 to 18 months |
| Low-acid foods | 2 to 5 years |
Additional Resources
Canning Recipes
I’ve found that a great way to get started with canning is to explore different canning recipes. There are plenty of online resources and even some books that offer a wide variety of canning recipes.
Be sure to check out my top picks for the Best Books on Home Food Preservation.
Local Resources
One of the best resources for canning beginners is the county extension office. They often hold canning workshops where you can learn the basics and ask questions to experienced professionals. Additionally, the National Center for Home Food Preservation is an excellent source of detailed information on various canning methods and techniques.
- County Extension Office: Find your local office
- National Center for Home Food Preservation: Learn more
Pin these Canning Tips for Later!
Put these tips to the test and try making Honey-Sweetened Strawberry Peach Jam!

Grab your Free Routine
The 15 Minute Homestead Routine (for busy days).
Want a simple morning rhythm that keeps your home running, your garden growing, and your goals on track? Grab my free 15-Minute Morning Routine Worksheets—designed to help you build homestead habits that stick.
About the Author
Brittany Gibson is a modern suburban homesteader and the founder of The Homestead Challenge. She empowers women to adopt a simpler, more self-sufficient lifestyle, feeling confident to grow, create, and thrive on their own terms with joy and balance.
Read more about my transformation and join me in building our lives from scratch.
I’m so excited I found this resource! This is my first summer gardening and canning my harvest. I was feeling pretty intimidated, but your resource is so clear and full of helpful tips. Thank you for sharing!
Thanks so much for reading and yayy!!! Let me know if you have any questions along the way 🙂
Hi Brittany – I too have been intimidated to try canning for some reason. I want to make my own jams and buy the canning supplies. I’m going to read this again and try not to make the same mistakes you did. Thank you so much for sharing all of these great tips and canning info!
It’s surprisingly so easy once you get used to it! The hardest thing for me is actually making whatever goes inside! So start simple 🙂