
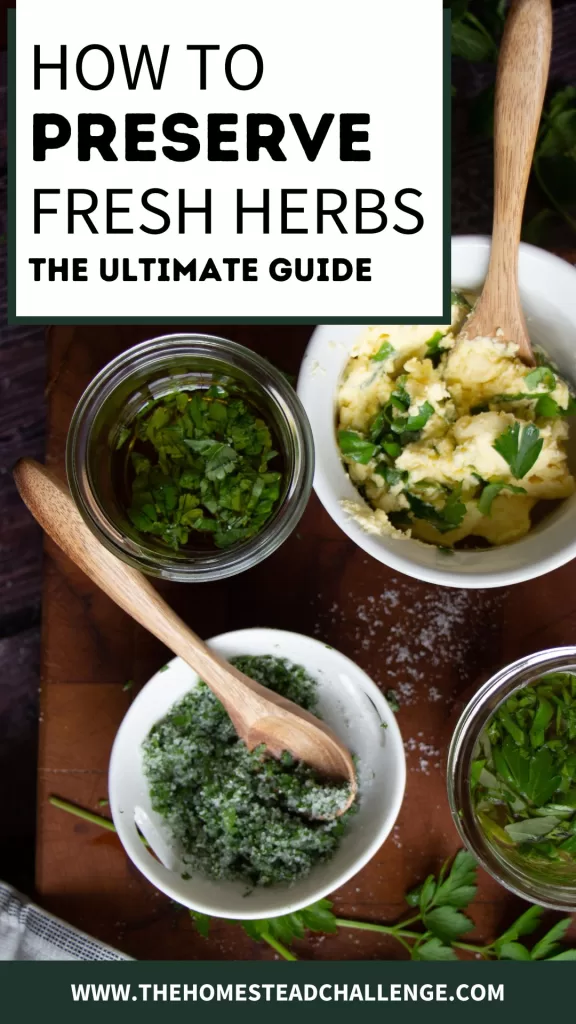
The Ultimate Guide on How to Preserve Fresh Herbs (7 Easy Methods)
Seven easy methods to preserve your fresh herbs from the garden and use them in fun ways!

Having an herb garden can be a great way to have access to the freshest and most flavorful herbs for all kinds of culinary or herbal remedy projects. But sometimes having too many of these delicious fresh herbs can be an issue. Luckily,we don’t always have to resort to drying them out for future use. There are a bunch of unique and innovative ways that you can preserve your fresh herbs in order to make them last as long as possible without losing flavor or texture.
Drying Herbs is a great way to preserve your herbs for the longest shelf life, but it won’t keep them “fresh.” Check out this post on drying and storing herbs for full instructions!

I am herb obsessed! I grow, forage, and buy way too many herbs, so I had to learn the best ways to preserve all of that herbal goodness!
I hope these methods help you preserve your personal harvest! Let me know your favorites in the comments or tag me on Instagram!
Seven Easy Ways to Preserve Fresh Herbs
Below are seven ways you can preserve herbs to keep them fresher longer, and to enhance any culinary dish! Click each one to jump to learn more about each section.

Grab your Free Routine
The 15 Minute Homestead Routine (for busy days).
Want a simple morning rhythm that keeps your home running, your garden growing, and your goals on track? Grab my free 15-Minute Morning Routine Worksheets—designed to help you build homestead habits that stick.
- Freezing Herbs
- Sugar Preservation
- Salt Preservation
- Butter Preservation
- Honey Preservation
- Oil Preservation
- Vinegar Preservation
Freezing Herbs
Freezing herbs is incredibly easy and will preserve your herbs for a very long time! Enjoy these thawed for cooking, or pop an herbal ice cube into a drink for a refreshing and yummy beverage!
Advantages of Freezing Herbs
- Retains flavor and nutrients: Freezing herbs preserves their fresh flavor and nutrient content, which can be lost during other preservation methods.
- Long shelf life: Frozen herbs can be stored for up to six months or more, making them a convenient and cost-effective way to preserve excess herbs.
- Easy and convenient: Freezing herbs is a simple and easy process that doesn’t require any special equipment or skills.
Disadvantages of Freezing Herbs
- Texture can be affected: Freezing can affect the texture of certain herbs, causing them to become limp or mushy.
- Limited uses: Some herbs may not retain their flavor or texture after being frozen and may be best used in dishes that are cooked, such as soups or stews.
- Freezer space: Storing frozen herbs can take up valuable freezer space, which can be a disadvantage if you have limited space available.
How to Freeze Fresh Herbs
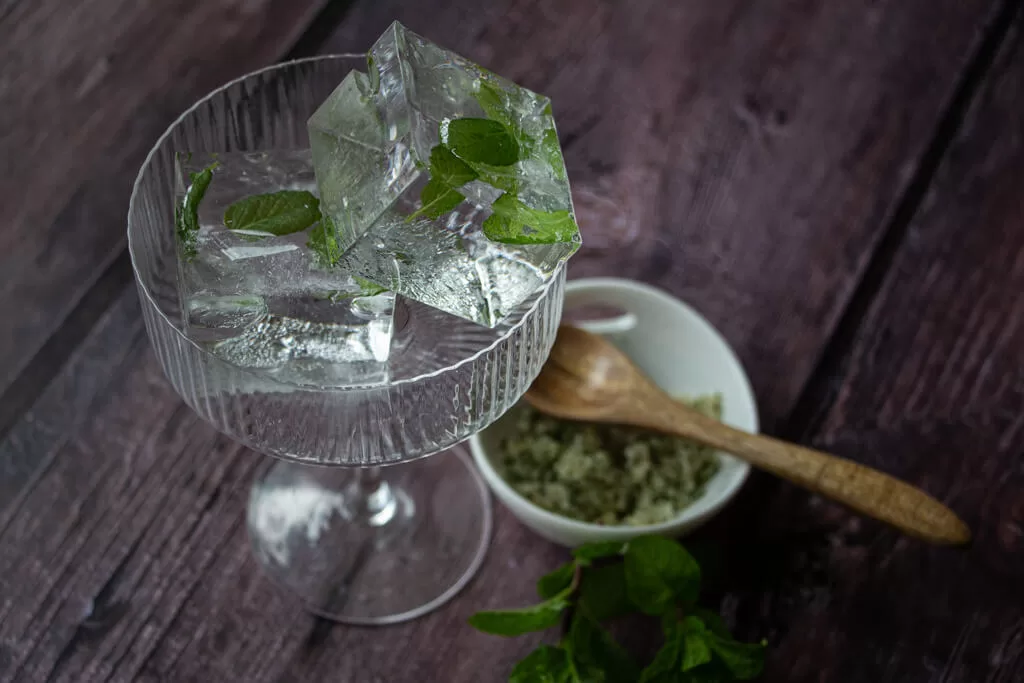
Freezing in Water:
- Remove tender herbs like mint, parsley, or cilantro from their stems and chop or leave whole.
- Pack ice cube trays with the herbs, filling each compartment about 3/4 full.
- Cover the herbs with water, making sure they are completely submerged.
- Place the ice cube trays in the freezer and let freeze until solid, which usually takes about 4-6 hours (or overnight).
- Once the herbs are frozen, transfer the ice cubes to a freezer bag or other airtight container for easy, single-serve access.
- Label and date the container and store it in the freezer for long-term preservation.
Herbs in water will not hold their texture well. If you use a large leafy herb, you might want to chop it quite a bit before freezing to avoid a limp or soggy product once thawed.
Fresh Herbs That Work Well Frozen in Water
Basil, mint, cilantro, sage, oregano, rosemary, thyme
You can end up with fun herb cubes for a refreshing drink!
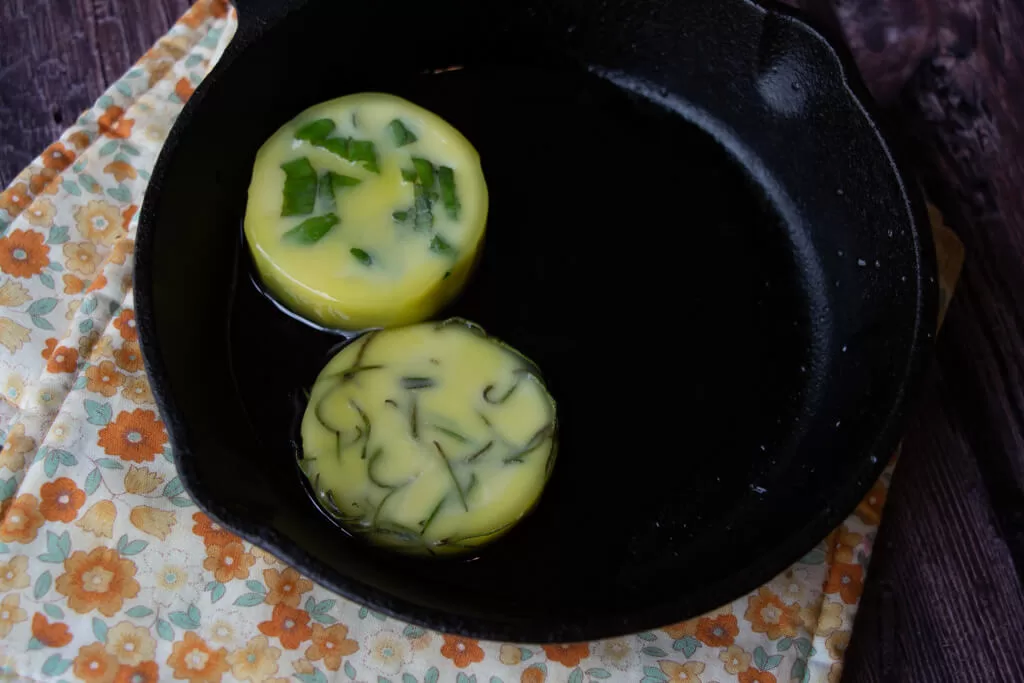
Freezing in Oil:
- Remove stems from herbs such as basil, oregano, or thyme and roughly chop the leaves.
- Combine about a cup of fresh herbs with 1/4 cup of olive oil in a food processor and pulse to blend.
- Transfer the mixture into ice cube trays, filling each compartment about 3/4 full.
- Cover the herbs with oil, making sure they are completely submerged.
- Place the ice cube trays in the freezer and let freeze until solid, which usually takes about 4-6 hours.
- Once the herbs are frozen, transfer the oil cubes to an airtight container for long-term storage.
- Label and date the container and store it in the freezer until needed.
Fresh Herbs That Work Well Frozen in Oil
Dill, basil, parsley, cilantro, oregano, rosemary, thyme
In order to pick whether to freeze in water or oil, think about how you will use the herb later.
Do you plan to defrost the herb and use as is? Then you want to freeze in water. If you plan to sauté, you might as well freeze in oil!
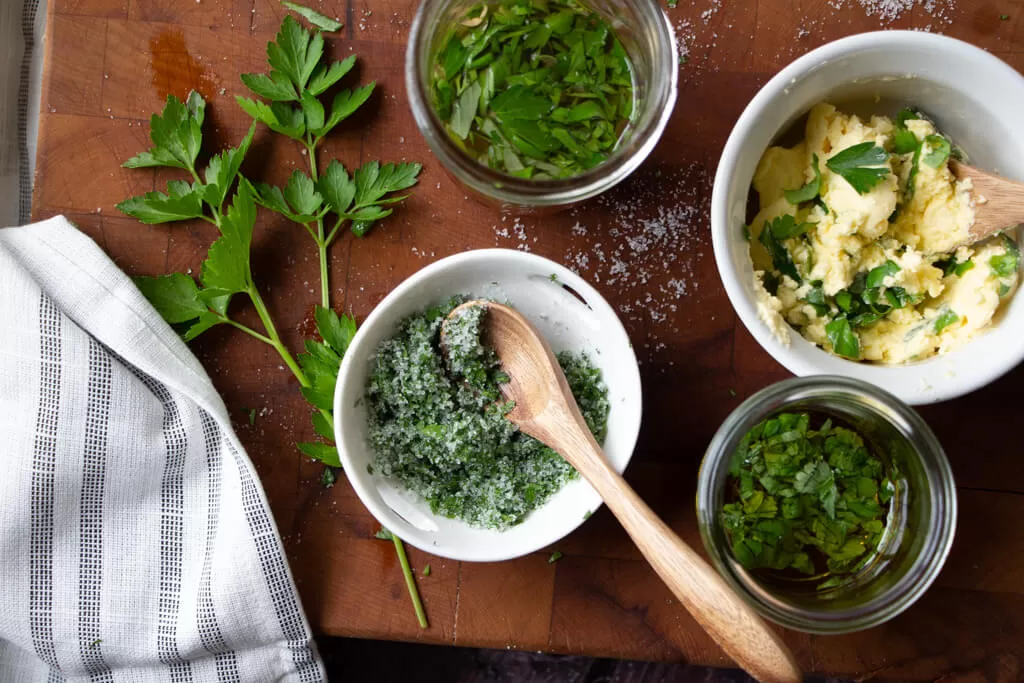
Sugar Preservation
Sugar preserving is fun, but it definitely doesn’t work for the flavors of all herbs. You can use the product as a sugar rim for a cocktail, to make a simple syrup, or to bake with for an extra punch of flavor in your baked cooks!
Advantages of Preserving Herbs in Sugar
- Long shelf life: Sugaring herbs can preserve their fresh flavor and aroma for up to several months or more.
- Adds sweetness: Sugaring herbs provides a sweet and aromatic flavor that can add a unique taste to a variety of dishes.
- Versatile: Sugared herbs can be used in many ways such as baking, desserts, teas, or cocktails.
Disadvantages of Preserving Herbs in Sugar
- Not all herbs are suitable: Not all herbs are suitable for sugaring, and some may lose their flavor during the sugaring process.
- Texture can be affected: Sugaring herbs can cause them to become sticky or clump together, which can affect their texture and appearance.
- Can be too sweet: Sugared herbs can be too sweet for some dishes, and may overpower other flavors if used in excess.
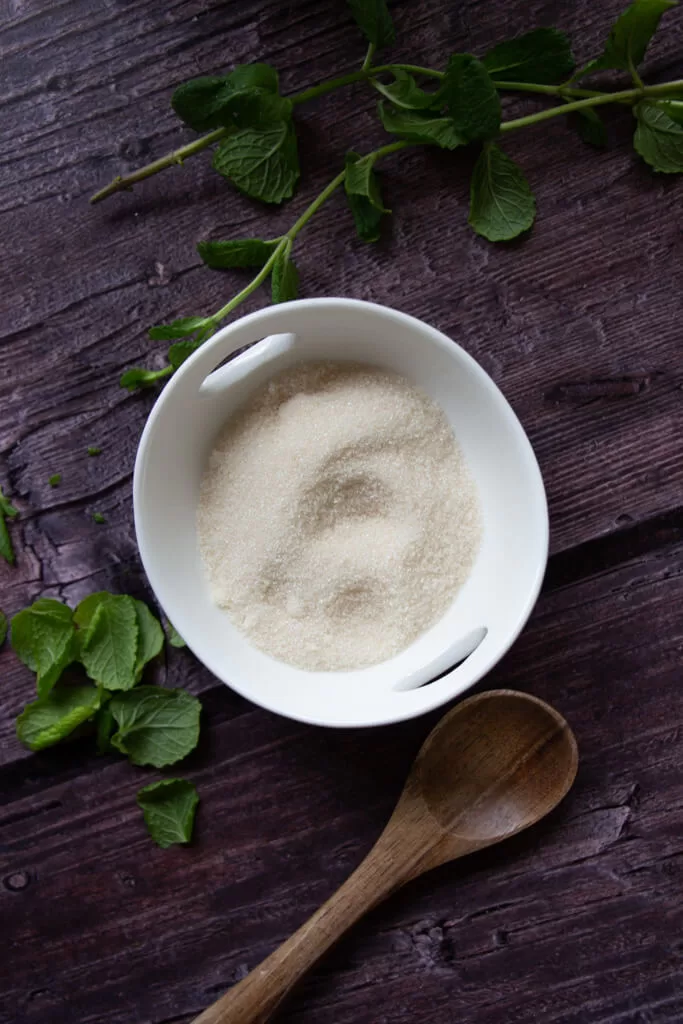
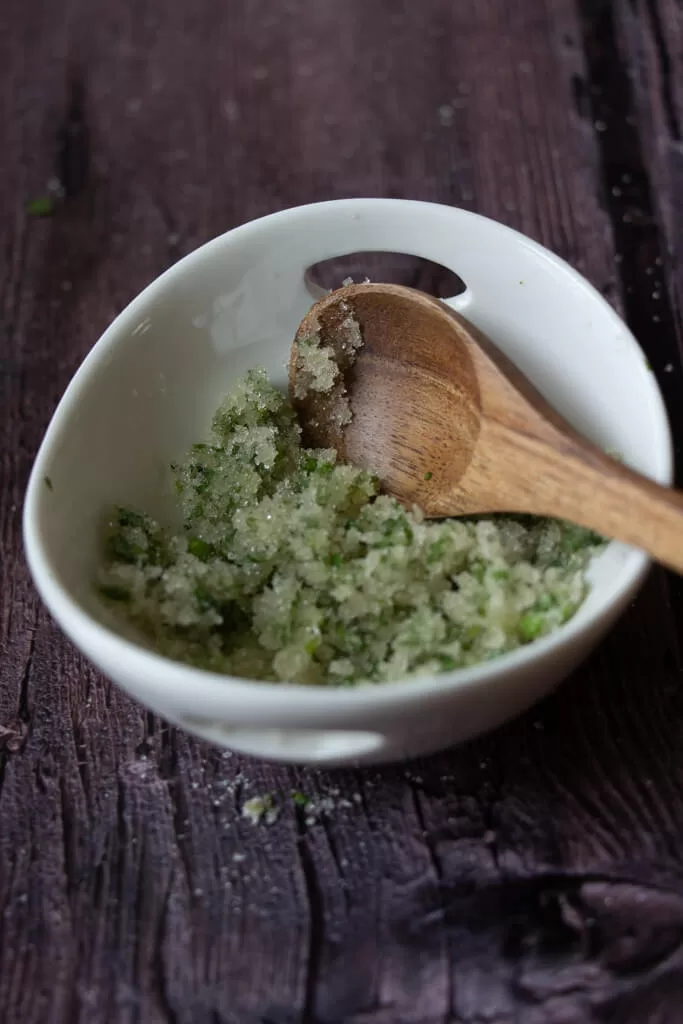
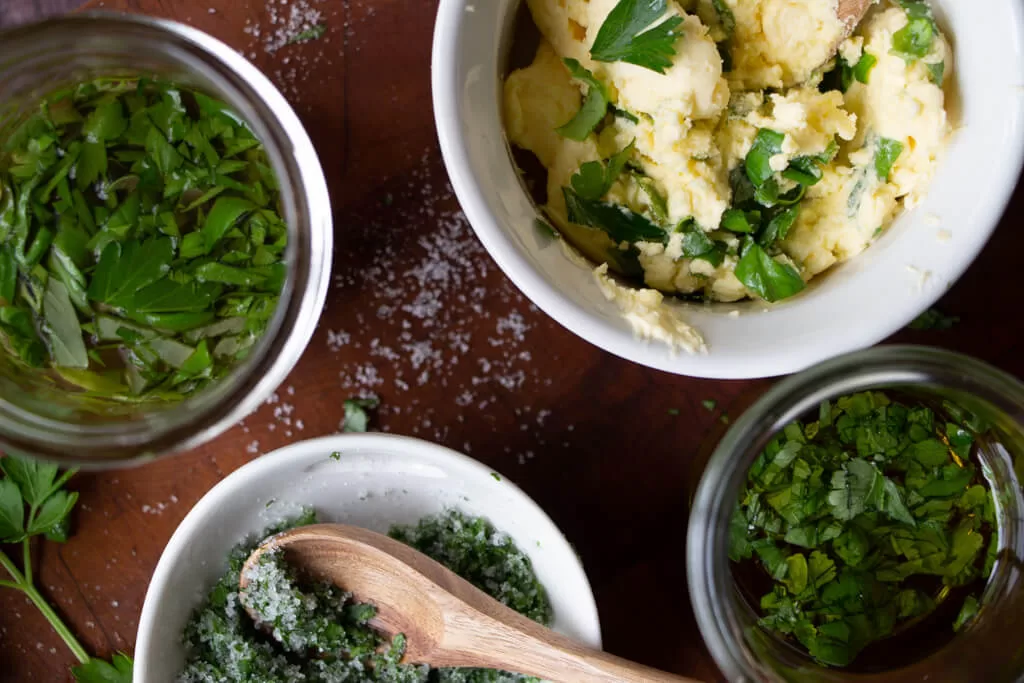
How to Preserve Herbs in Sugar
- Gather your fresh herbs of choice and sugar.
- Option 1: Layer fresh herbs and sugar in a glass jar. Start with a layer of sugar on the bottom, then add a layer of herbs. Continue layering until the jar is full.
- Option 2: Add a handful of fresh herbs and sugar into a food processor and blend until finely minced.
- Store the herb-flavored sugar in a cool, dark place, or in the refrigerator to keep it fresh.
- Use herb-flavored sugar to add a unique flavor to baked goods, cocktails, or enjoy it on its own.
- Experiment with different herb and flavor combinations to create your own unique blends.
Fresh Herbs That Work Well With Sugar
Mint, lemon balm, lavender, rosemary, thyme, sage
By experimenting with different herb and flavor combinations, you can preserve your favorite herbs and any surplus spices you may have on hand with herbal infused sugar. Don’t hesitate to try out new combinations and discover the endless possibilities of herb-flavored sugar in your kitchen!
Salt Preservation
Advantages of Preserving Herbs in Salt
- Long shelf life: Salt-preserved herbs can last for several months or more, making it a convenient and cost-effective way to preserve excess herbs.
- Intensifies flavor: Salt-preserved herbs can have a more intense flavor and aroma than fresh herbs, making them a great seasoning for a variety of dishes.
- Easy to prepare: Preserving herbs with salt is a simple and straightforward process that requires little equipment or special skills.
Disadvantages of Preserving Herbs in Salt
- Can be too salty: Salt-preserved herbs can be too salty for some dishes, and it’s important to rinse off excess salt before using them.
- May lose some nutrients: Salt-preserved herbs may lose some of their nutrient content, including vitamins and minerals.
- Texture can be affected: Salt-preserved herbs can become soft and may not be suitable for dishes that require a firm texture.
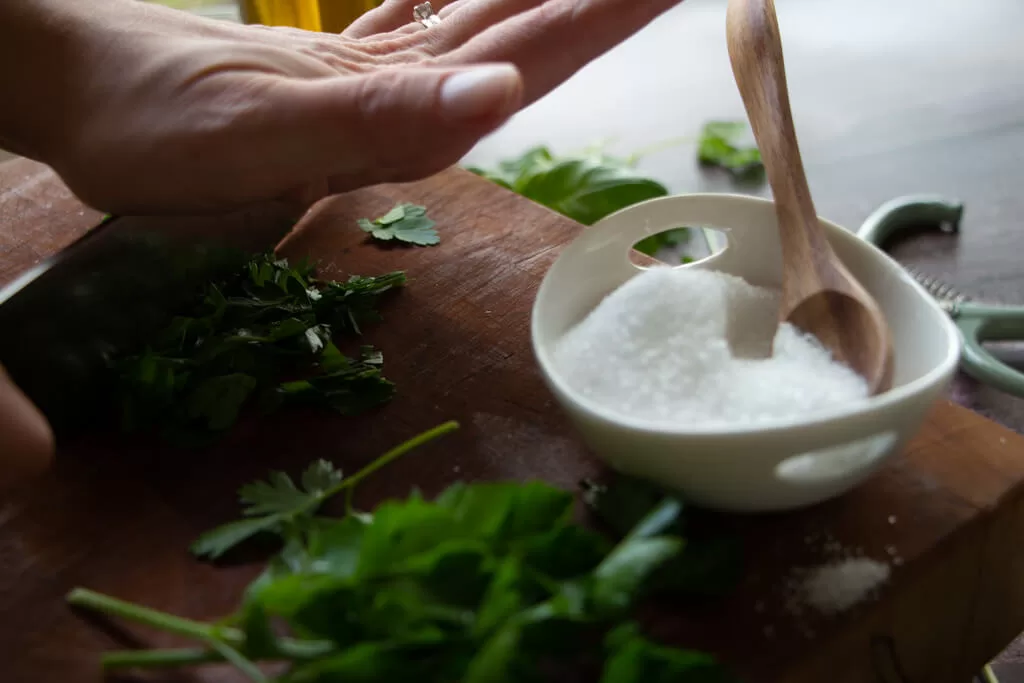
How to Preserve Herbs in Salt
You can preserve herbs in salt by chopping the herbs finely, mixing salt, and baking. However, that is technically a drying method, and we are keeping things fresh here!
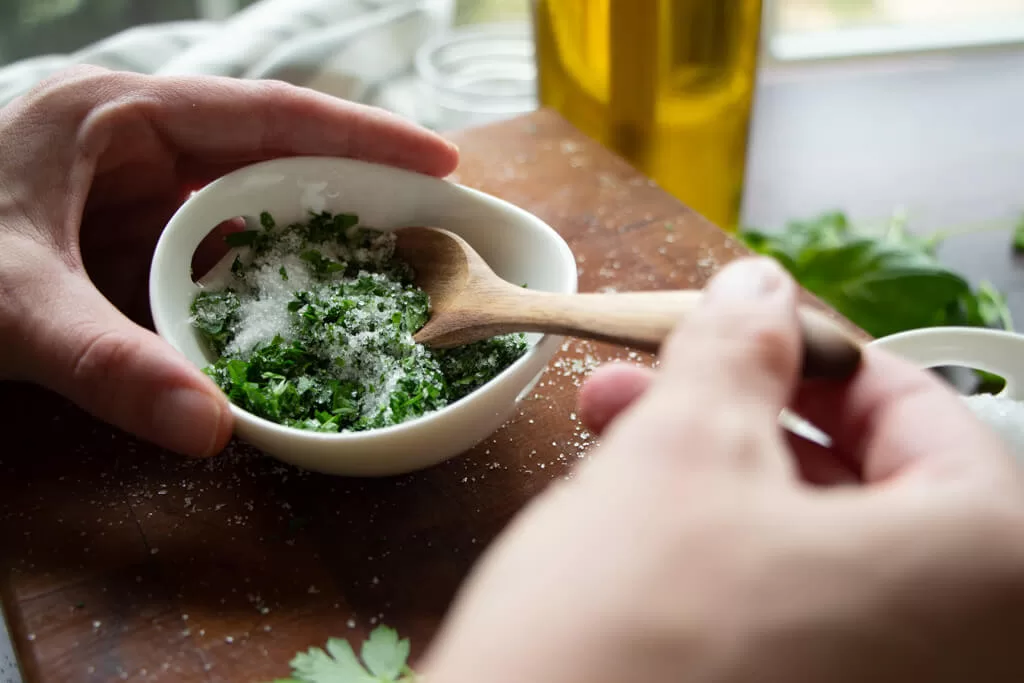
To make fresh herbed salt:
- Finely chop desired herbs by hand or in a food processor.
- Combine well with salt by hand or in food processor.
- Store in airtight container in refrigerator for up to 6 months.
You can also blend herbs to make a super potent and colorful salt!
Fresh Herbs That Work Well With Salt
Cilantro, parsley, chives, dill, thyme, rosemary
Using herbed salt not only adds flavor and texture to dishes, but also helps preserve those flavors for longer periods of time without requiring any special equipment or techniques such as dehydration. The combination of salt and herbs works perfectly together to give dishes that extra kick they need while making sure no taste is too overpowering. Try herbed salt on roasts or potatoes for an added depth of flavor that will surely impress your guests!
Butter Preservation
Butter won’t make your herbs last all that much longer unless you freeze it. But, butter is a fun way to spice up any dish or to serve with fresh bread as a treat to the eyes and to the tummy!
Advantages of Preserving Herbs in Butter
- Adds flavor: Butter can absorb the flavor of herbs, making it a great way to add herb flavor to a variety of dishes.
- Long shelf life: Butter-preserved herbs can last for several weeks or more when stored properly.
- Versatile: Herb-infused butter can be used in a variety of dishes, including spreading on toast, adding to pasta dishes, or using as a flavor enhancer for grilled meats.
Disadvantages of Preserving Herbs in Butter
- High in fat: Butter is high in fat, so it may not be ideal for people on low-fat diets.
- Short shelf life after use: Once the butter is used in a dish, it typically has a shorter shelf life than other preservation methods.
- May mask other flavors: Herb-infused butter can overpower other flavors in a dish, and it may not be suitable for all recipes.
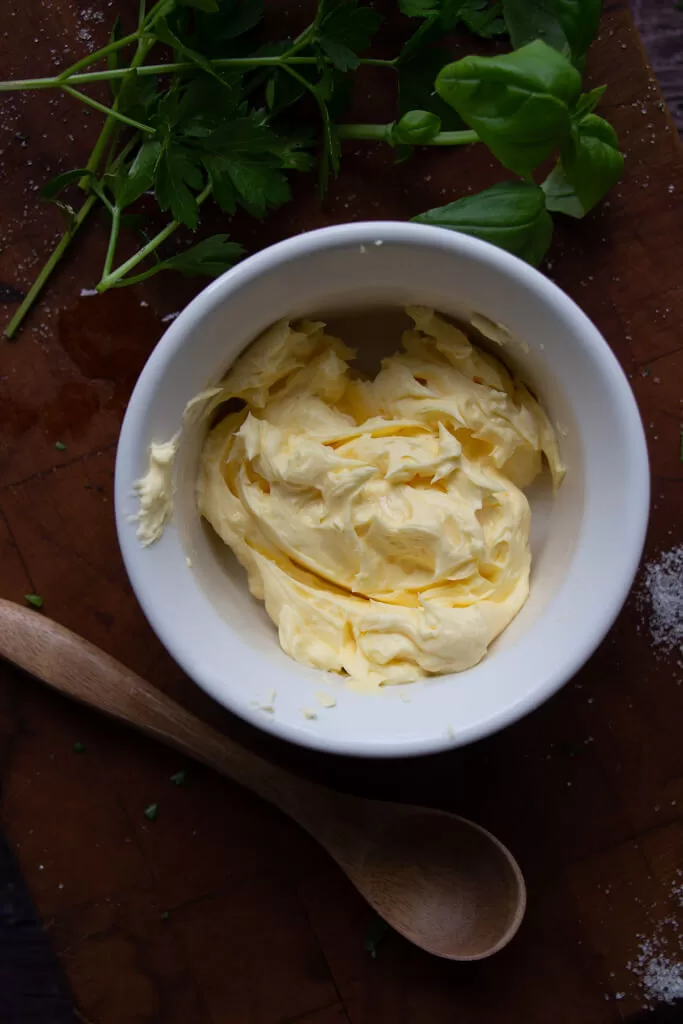
Herbed butter is an easy DIY way to have delicious flavors at your fingertips. Taking a few minutes to whip up a batch of herbed butter will be worth the effort when you need it for sautéing, spreading or stuffing.
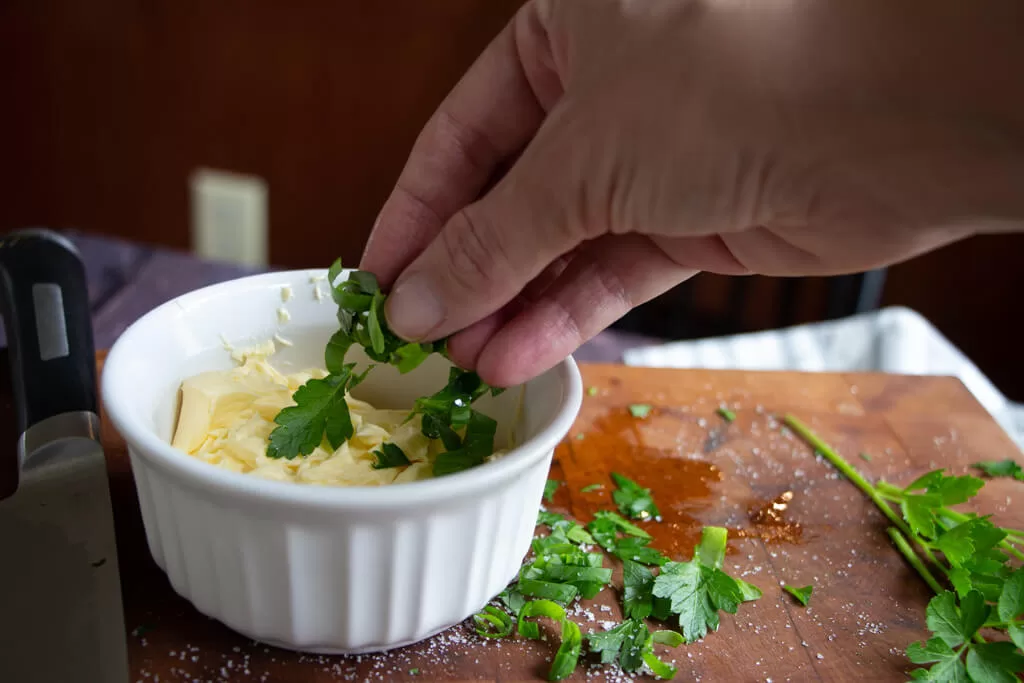
How to Preserve Herbs in Butter
- Rinse fresh herbs and dry them completely.
- Mince the herbs into fine pieces.
- Leave butter out of the fridge until it softens (I used homemade butter here. Yum!).
- Mix the minced herbs into the softened butter.
- Season with salt or lemon zest if desired.
- Mix well until the herbs are evenly distributed in the butter.
- Transfer the herbed butter to a small jar or container.
- Chill in the fridge for at least an hour before using.
- Use the herbed butter for sautéing, spreading, or stuffing.
- Herbed butter can last up to four weeks in an airtight container in the fridge and feels utterly luxurious while making a huge difference in flavor when served on bread, potatoes, sandwiches or any other dish you can come up with!
Fresh Herbs That Work Well With Butter
Rosemary, thyme, cilantro, basil, chives, parsley, oregano, garlic
Herbed butter also makes an ideal gift! Wrap it in parchment paper, tie with ribbon and your recipient will be delighted whenever they use it! Whether you’re looking for an easy way to store fresh herbs or searching for a tasty addition to upgrade any dish without spending too much time in the kitchen — Herbed Butter is definitely worth giving a try!
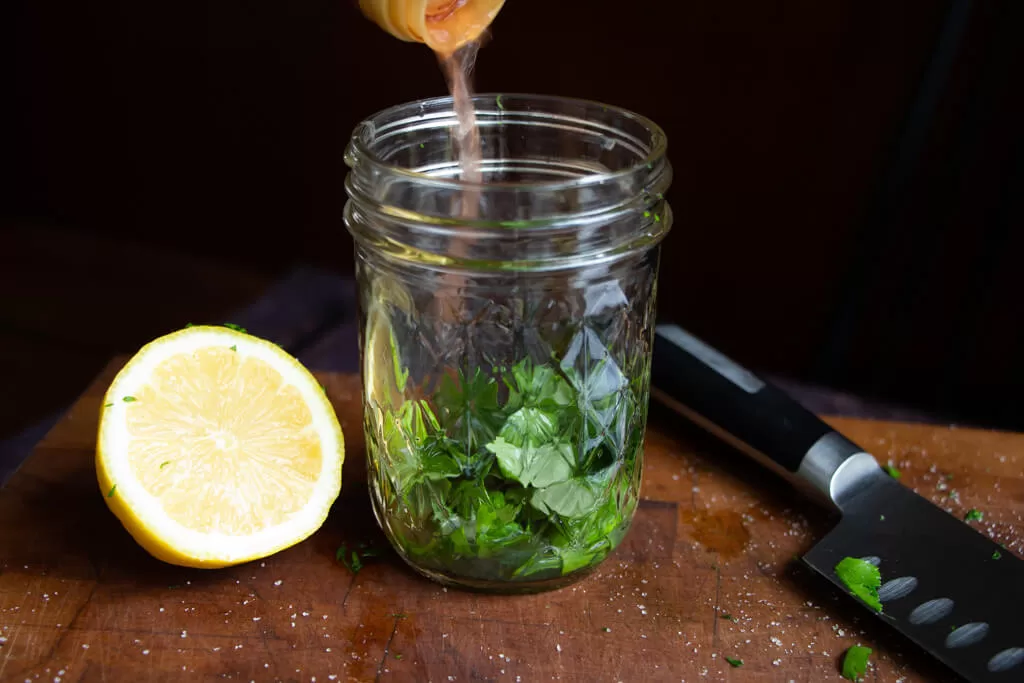
Honey Preservation
Herbal honey offers a unique and flavorful twist on the traditional sweetener. In addition to its delicious taste, it provides a multitude of health benefits as well. Honey is known for being an excellent natural preservative – it has antibacterial, anti-fungal and antiviral properties, making herbal honey a go-to option for those looking to keep their herbs fresh for much longer than in other methods of preservation.
Bonus, herb infused honeys make an excellent herbal remedy!
Advantages of Preserving Herbs in Honey
- Adds sweetness: Honey can add a sweet and floral flavor to herbs, making it a great way to add a unique taste to a variety of dishes.
- Long shelf life: Honey-preserved herbs can last for several months or more when stored properly, making it a convenient way to preserve excess herbs.
- Versatile: Honey-infused herbs can be used in a variety of dishes, including desserts, baked goods, and beverages.
Disadvantages of Preserving Herbs in Honey
- Can be too sweet: Honey-preserved herbs can be too sweet for some dishes, and may overpower other flavors if used in excess.
- May change texture: Honey-preserved herbs may become sticky or syrupy, which can affect their texture and appearance.
- Can be expensive: Honey can be more expensive than other preservation methods, making it a less cost-effective option for some people.

Fresh Herbs That Work Well With Honey
Lavender, rosemary, time, sage, cinnamon, ginger, lemon balm, mint, chamomile, garlic
While any type of honey can be used for this purpose, it is best to use local, unprocessed and uncooked varieties to maximize the herbal benefits!
How to Preserve Herbs in Honey
- Place your herbs whole or minced into a clean glass jar and cover with honey.
- Let the mixture infuse for 6 weeks or more so the flavors have time to penetrate before using it as desired – in teas, syrups, baked goods or even as a base for glazing meat dishes.
- I usually strain my herbed honey before use, but it is not necessary!
Herbal honey is so versatile and makes an excellent condiment with numerous culinary uses while also providing health benefits galore when used as an herbal remedy!
Oil Preservation
Advantages of Preserving Herbs in Oil
- Preserve flavor: Oil can preserve the flavor and aroma of herbs, making it a great way to extend the shelf life of fresh herbs.
- Versatile: Oil-preserved herbs can be used in a variety of dishes, including dressings, marinades, and dips.
- Long shelf life: Oil-preserved herbs can last for several months or more when stored properly, making it a convenient way to preserve excess herbs.
Disadvantages of Preserving Herbs in Oil
- Can be expensive: Using high-quality oil for herb preservation can be more expensive than other preservation methods, making it a less cost-effective option for some people.
- Risk of botulism: Oil preservation can create an environment that encourages the growth of bacteria that causes botulism. This risk can be reduced by using proper storage techniques and avoiding garlic and fresh herbs in oil preservation.
- Changes to texture and appearance: Oil-preserved herbs may become wilted or discolored, and the oil may take on the flavor of the herbs, which can affect the texture and appearance of the herbs.
Preserving herbs in oil is a simple and tasty way to keep fresh herbs on hand for use in a variety of dishes. The oil helps to extract the essential oils and flavor compounds from the herbs and preserve them for later use.
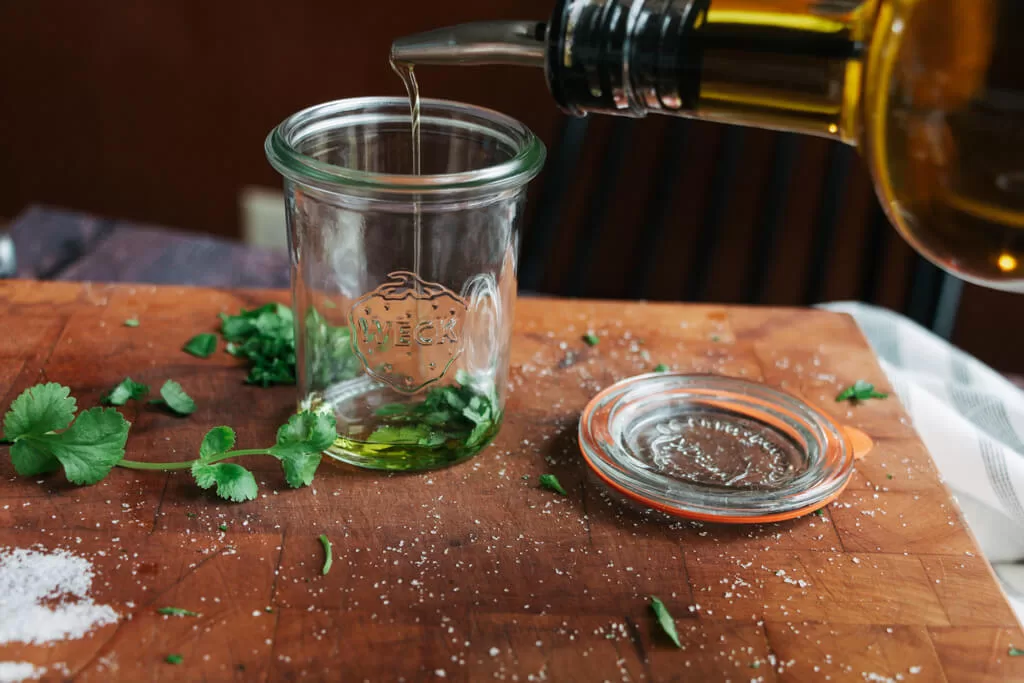
How to Preserve Herbs in Oil
- Start by washing and drying the herbs thoroughly.
- Remove the leaves from the stems and chop them finely.
- Place the chopped herbs in a clean, dry jar and cover them with a high-quality oil, such as olive oil.
- Make sure the herbs are completely submerged in the oil to prevent spoilage.
- Seal the jar tightly and store it in a cool, dark place for several days to allow the flavors to meld and develop.
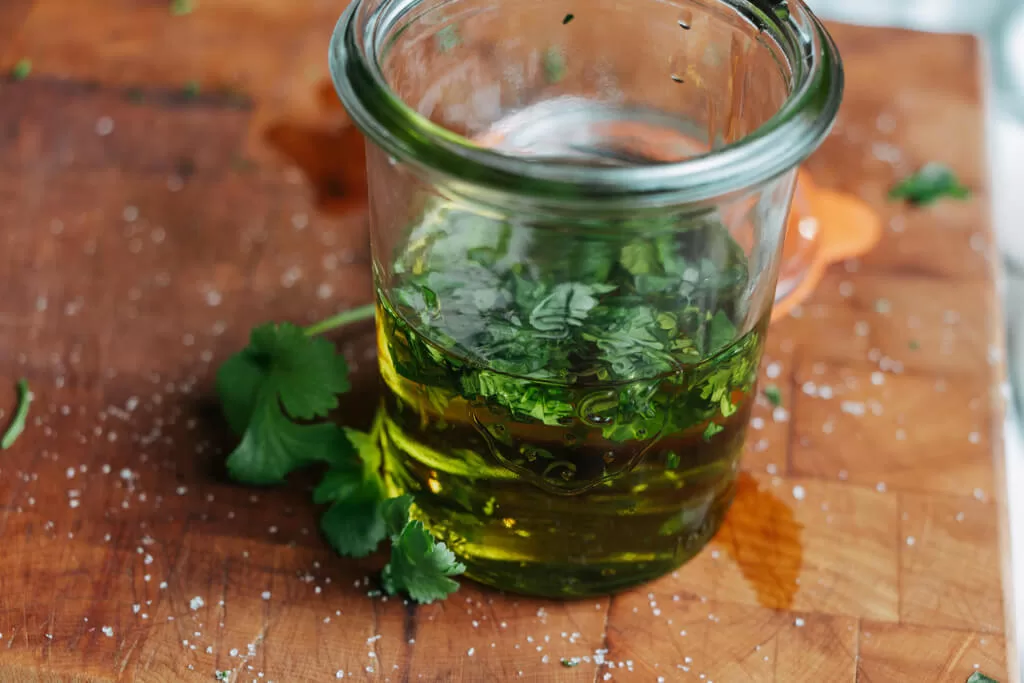
- Once the herbs have infused the oil, strain the mixture through a fine-mesh strainer
As an Amazon Associate, I earn from qualifying purchases. Please visit my privacy policy page for more details.
or cheesecloth to remove any solids.
When storing herb-infused oil, make sure to keep it in a cool, dark place to prevent spoilage. Use the oil within a few weeks to ensure its freshness. I really recommend refrigerating when using fresh herbs without drying, like I do with my fresh chive oil.
The resulting herb-infused oil can be used in a variety of ways, such as for salad dressings, marinades, sautéing vegetables, and as a finishing oil for dishes such as pasta or pizza.
My favorite infused oils are actually for bath and body products, like this Lemon Balm and Lavender Body Oil!
Fresh Herbs That Work Well in Oil
Rosemary, thyme, basil, oregano, sage, garlic, chili, lemon balm, lavender
Preserving herbs in oil is a simple and delicious way to make use of excess herbs from your garden or farmer’s market. It adds a unique and flavorful twist to a variety of dishes, and can be easily customized to suit your tastes.
Vinegar Preservation
Advantages of Preserving Herbs in Vinegar
- Preserve flavor: Vinegar can preserve the flavor and aroma of herbs, making it a great way to extend the shelf life of fresh herbs.
- Versatile: Vinegar-preserved herbs can be used in a variety of dishes, including salads, dressings, and marinades.
- Inhibits bacterial growth: The acidity of vinegar can help to inhibit bacterial growth, making it a safe preservation method.
Disadvantages of Preserving Herbs in Vinegar
- Can be too acidic: Using too much vinegar or leaving the herbs in vinegar for too long can make them too acidic, which can overpower other flavors and make them less pleasant to eat.
- Changes to texture and appearance: Vinegar-preserved herbs may become wilted or discolored, which can affect the texture and appearance of the herbs.
- Strong odor: Vinegar can have a strong odor, which can affect the taste and aroma of the herbs.
Vinegar helps to extract the essential oils and flavor compounds from the herbs and preserves them for later use.
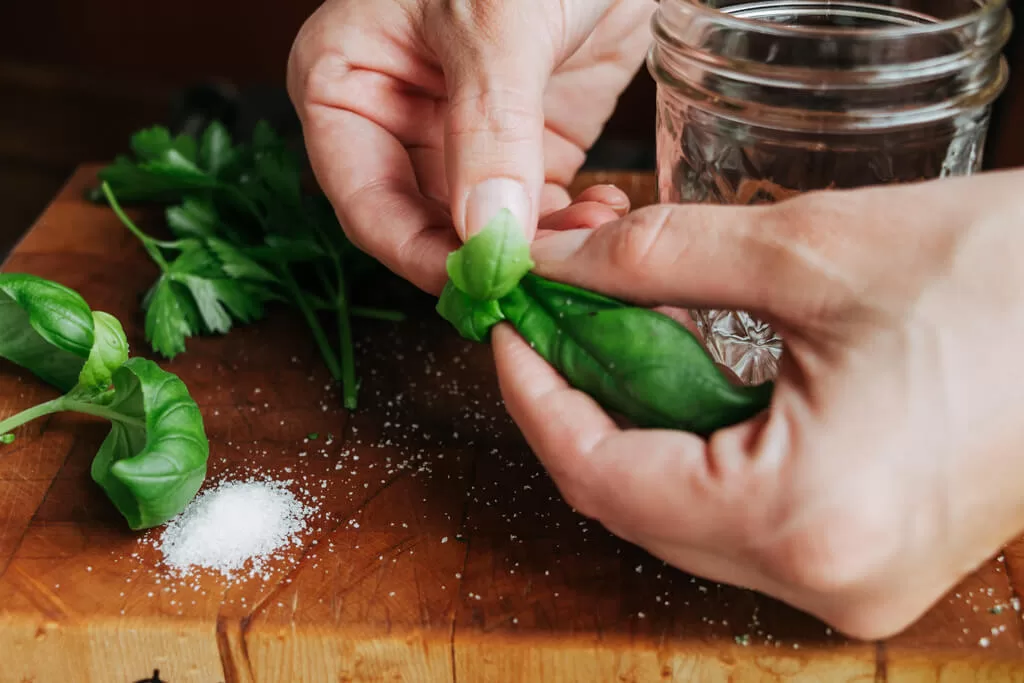
How to Preserve Herbs in Vinegar
- Fill a clean glass jar with fresh herbs of your choice and cover them with vinegar.
- Use a good quality vinegar, such as white wine or apple cider vinegar, for best results. Here, I used organic red wine vinegar to start infusing the herbs for a salad dressing.
- Seal the jar tightly and store it in a cool, dark place for a few weeks to allow the flavors to meld and develop.
- Once the herbs have infused the vinegar, strain the mixture through a fine-mesh strainer
As an Amazon Associate, I earn from qualifying purchases. Please visit my privacy policy page for more details.
or cheesecloth to remove any solids.
The resulting herb-infused vinegar can be used in a variety of ways, such as in salad dressings, marinades, and sauces.
You can also infuse antibacterial herbs in white vinegar to create a cleaning solution, like this DIY Thieves All-Purpose Cleaner.
Fresh Herbs That Work Well With Vinegar
Tarragon, Thyme, Rosemary, Basil, Sage, Parsley, Eucalyptus, Clove
Preserving herbs in vinegar is a great way to make use of excess herbs from your garden or farmer’s market. It is a simple, yet effective way to preserve the flavor and aroma of fresh herbs and adds a delicious, unique flavor to a variety of dishes.
In general, it’s important to use fresh and high-quality herbs for preservation, and to store them in a cool, dark, and dry place to extend their shelf life. It’s also important to follow safe preservation guidelines to minimize the risk of spoilage or bacterial growth.
Let me know! What is your favorite method to preserve your herb harvest? Tell me in the comments!
Want to take your food preservation to the next level? Learn my best tips on canning for beginners!
Pin it for Later!

About the Author
Brittany Gibson is a modern suburban homesteader and the founder of The Homestead Challenge. She empowers women to adopt a simpler, more self-sufficient lifestyle, feeling confident to grow, create, and thrive on their own terms with joy and balance.
Read more about my transformation and join me in building our lives from scratch.
This is such a great post!!! I am pinning it too! I love herbs so much. It’s a big part of my own blog. I’m hoping to make more honey infusions this summer. So far with the ones I’ve tried, I have loved my basil honey. It’s such a nice pick me up on a dreary winter day.
Basil honey sounds amazing! I made chili and sage honey to put on BBQ and I love it!
Wow!! This is all the things! What an amazing resource. I know where I’m coming when my garden starts blooming this year…
ALL THE THINGS! WITH ALL THE HERBS! Can you tell I have an obsession?
This is amazing! I am pinning for later! I always have an abundance of herbs that I need to preserve and this is the most comprehensive guide I’ve ever seen.
haha thanks for pinning! It really is a beast of a guide 🙂
I had no idea there were so many Options! Great post!
This is so neat! I didn’t even think to preserve herbs in honey, so neat. I’ll definitely be coming back to this once our herbs are in full force this spring and summer. Thanks so much!
I cannot wait to try these, these ideas look amazing!!
I love preserving herbs but have only done dried and freezer. I’ve never heard of the other ways. This is great! I can’t wait to try the salt way first. Great pictures, great layout of pros and cons. Very informative. Thank you!
Yes! We used the salt and butter I made here for burgers this weekend and they were the best burgers ever!
This is such a great guide! I never knew there were so many different ways to preserve herbs. Definitely saving this for future use.
Thanks friend!
What a great post. I needed this. I am saving this for future reference.
Brittany, I love this post. I pinned it to my herb board (https://www.pinterest.com/studiosprig/herbs-in-your-home-studio-sprig/)
I preserve by drying and I’ve also tried olive oil. But the other methods I have not tried yet? Thank you for such a nice comprehensive blog. I’d love to coordinate our pinterest boards…I can invite you to collaborate.